Editing tables
After inserting a table in a document, it's always possible to edit it using the Edit tool. For example, you can select a row and use Insert After to insert after it another row or you can select a cell and use Insert Before to insert before it another cell. However the Edit tool does not make it easy working on table columns.
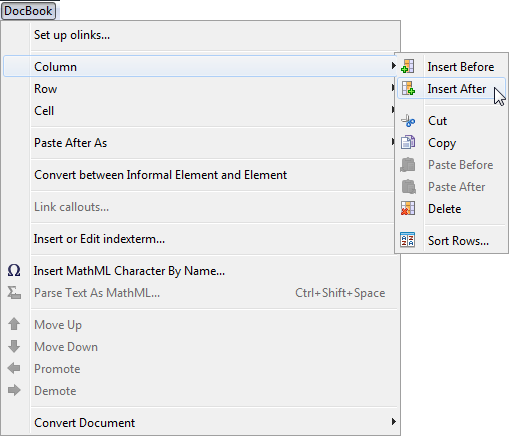
Fortunately, the DocBook, DITA Topic and XHTML menus all have Column, Row and Cell submenus which allow to perform all sorts of operations on table columns, rows and cells. For example, ColumnInsert After adds an empty column after the one containing the caret.
Note that
precisely adjusting the presentation of a table may require you to use the
Edit tool and the Attributes tool. For example, making the
third column of a DocBook table twice as wide as the other columns
requires you to insert a colspec element before the
thead or tbody of the tgroup and then specify
attributes colnum="3" and colwidth="2*" for the new
colspec. However, when a precise column width is not required,
suffice to drag the column separator as you would do it in any
word-processor.

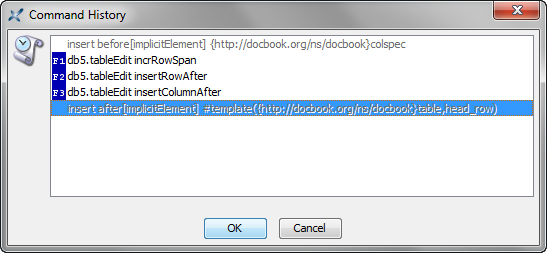
In
the above screencast, the user pressed Ctrl-A
(that is, EditRepeat) twice, one time
to repeat RowInsert After
and another time to repeat CellIncrement Row Span. If you don't remember
which is the last repeatable command you have invoked, then you may want
to use EditCommand History
(Ctrl+Shift-A).
EditRepeat) twice, one time
to repeat RowInsert After
and another time to repeat CellIncrement Row Span. If you don't remember
which is the last repeatable command you have invoked, then you may want
to use EditCommand History
(Ctrl+Shift-A).