| |
| |
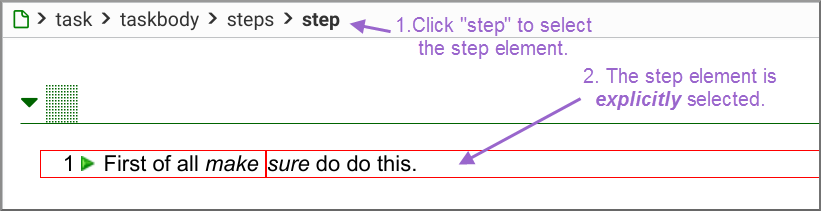
 are text placeholders. You
can click into (or tab to) such placeholders and start
typing.
are text placeholders. You
can click into (or tab to) such placeholders and start
typing.

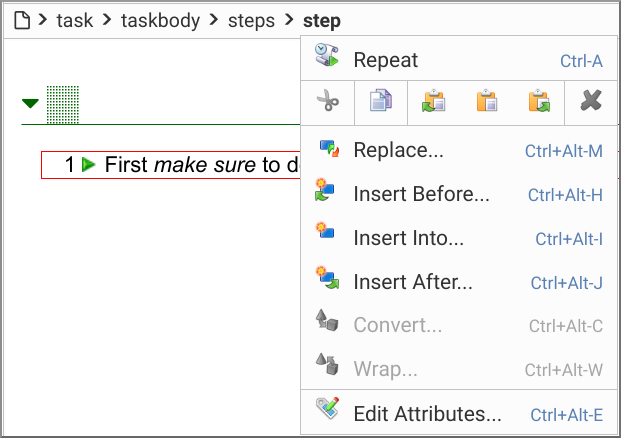
NoteNote that XXEW does not work like other XML
editors. In other XML editors,
|
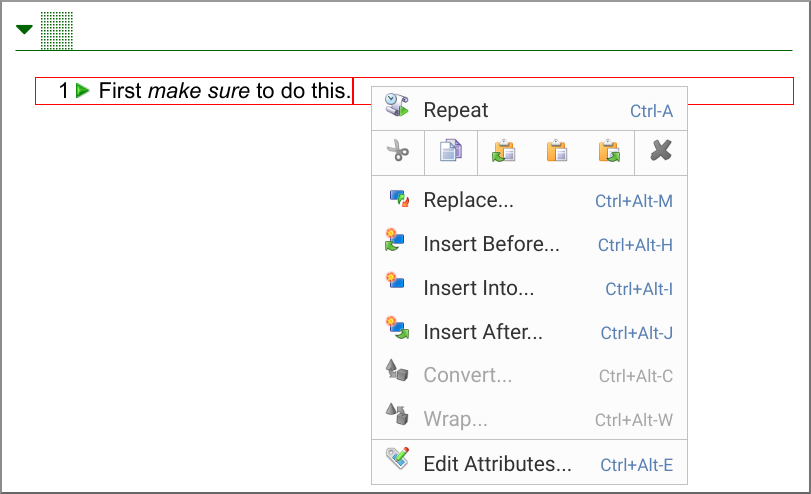
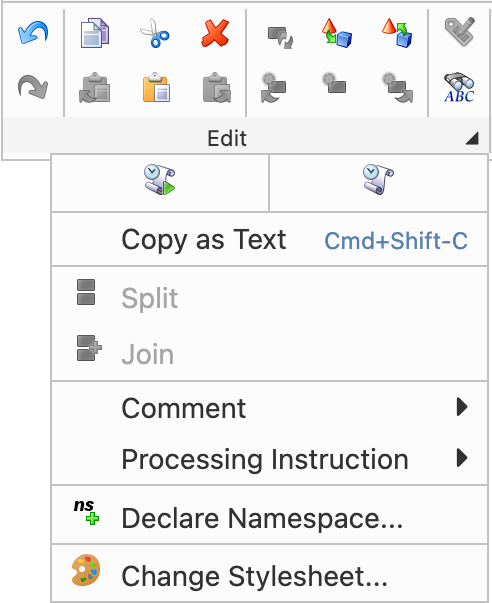

TipCommands Split and
Join are rarely used because for most
document types pressing Enter,
Backspace and
Delete mimic the behavior
corresponding keystrokes in a word processor and thus may be
used to split and join elements. Examples:
|
NoteIf the current document is conforming to a DTD, the
dialog box lets the user view the namespaces and their
prefixes but not modify them.
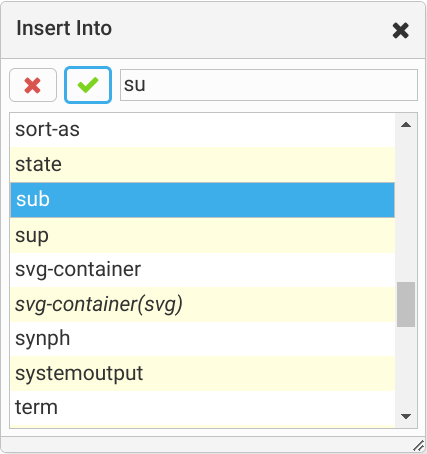
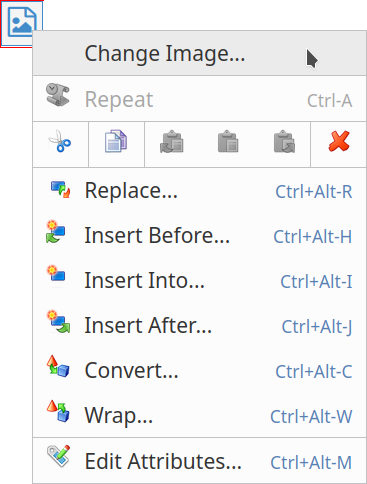
|
NoteAn image placeholder icon is
given different colors and different tooltips in order to explain its
presence:
|
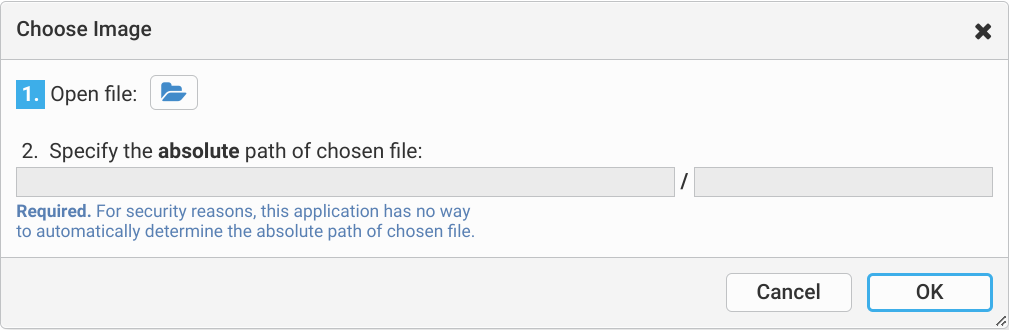
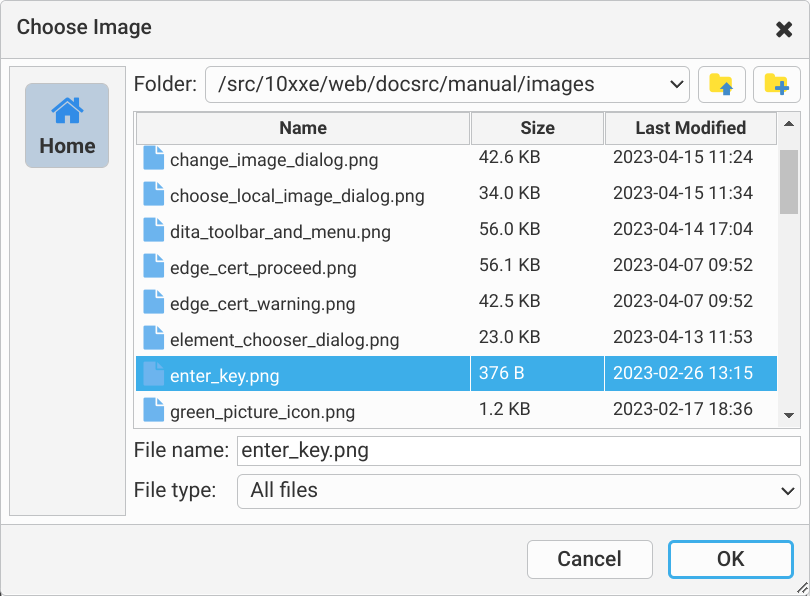
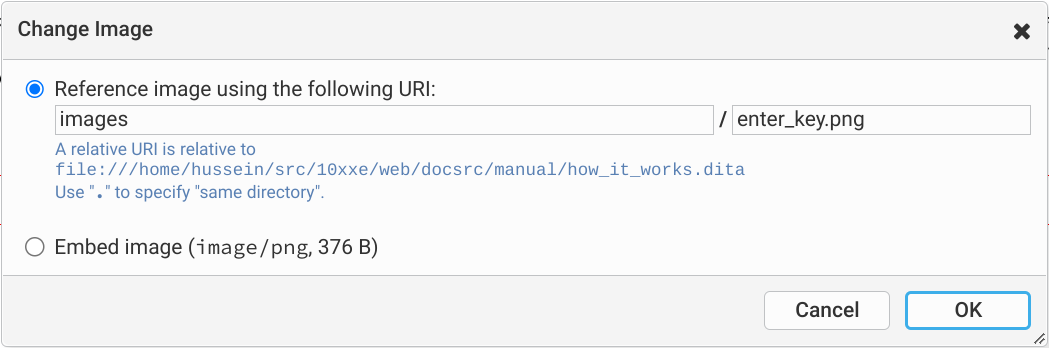
NoteWhen the document being edited
was opened from a remote file, this method is the only way to
add to your document an image coming from a local
file.
|
<image>, DocBook
<imagedata>, XHTML
<img>.<image>/@href,
DocBook
<imagedata>/@fileref,
XHTML
<img>/@src.
NoteWhen the document being edited was opened from a
local file, there is no way to display an image file specified
this way. This has already been explained in note
about local images. However, after using this method, the
blue image placeholder icon
|
| (1) | In this example, we'll assume that case a note must contain paragraphs hence a paragraph may not be converted to a note. |
| (2) | Not recommended for document size and possible interchange problem reasons. |
| |