| 3. Using the facilities added by the "Easy Profiling" add-on | ||
|---|---|---|
 |  | |
| 3. Using the facilities added by the "Easy Profiling" add-on | ||
|---|---|---|
| | | |
![[Important]](images/important.svg) | Important preliminary step if you author DocBook documents |
|---|---|
If you author DocBook documents and want to work with conditional processing profiles, then please use " → → " to select the profiling XSLT stylesheets. This step is needed because, out of the box, it's the normal XSLT stylesheets, which do not support conditional processing, which are selected by default. Note that there is no such preliminary step if you author DITA documents. |
Using the facilities added by the "Easy Profiling" add-on involves the following steps:
Create a ".profiles" file, specifying a set of conditional processing profiles, in XMLmind XML Editor.
Associate the ".profiles" file to the document being edited.
Set profiling attributes on some elements contained in the document being edited.
Select one of the available profiles.
Generate the corresponding deliverable.
We'll use here the same DITA example as in Section 2, “Working with conditional processing profiles without the facilities added by the "Easy Profiling" add-on”. All the XML files used in this example are found in directory sample/.
Create editions.profiles in XMLmind XML Editor.
This is done using → and then selecting the DITA|Conditional Processing Profiles document template from the dialog box.
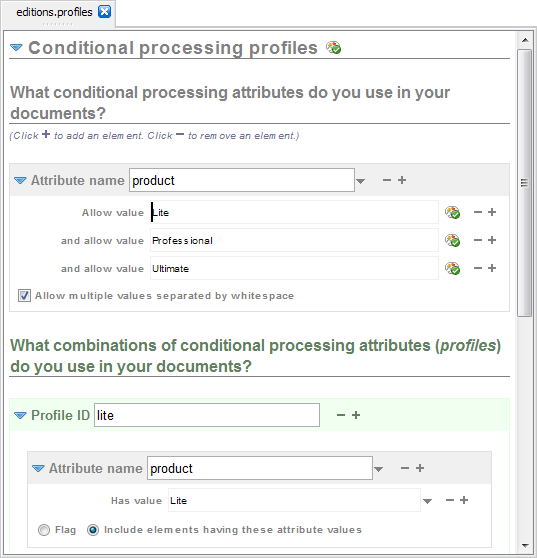
In the first section titled "What condition processing attributes...", specify that you want to use standard profiling attribute product and that you allow it to have the following values: Lite, Professional, Ultimate.
The  menu which is next to the "Attribute name" field lets the user choose the name of a standard profiling attribute.
In the second section titled "What combinations...", define profile "lite" as having attribute product with value Lite.
The menu which is next to the "Attribute name" field lets the user choose the name of one of the attributes specified in section "What condition processing attributes...".
The menu which is next to the "Has value" field lets the user choose one of the allowed attribute values.
Repeat the previous step to define profile "pro" and to define profile "ultimate".
It's possible to automatically add some styles to elements having a given profiling attribute value. This facility makes it easy spotting on screen which are the elements which have been marked for conditional processing.
This is done by clicking the  button which is next to each "Allow value" field. This button displays the "Set Style" dialog box.
Use this dialog to give a dark red text color to all elements having attribute product containing value Lite.
Repeat the previous step to give a dark green color to all elements having attribute product containing value Professional and a dark blue color to all elements having attribute product containing value Ultimate.
Besides styling individual profiling attributes, it's also possible to style the elements which are going to be included or excluded from the deliverables (PDF, RTF, HTML, etc).
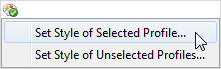
This is done by clicking the button which is next to the "Conditional processing profiles" document title. This button displays a menu having two entries:
 |
|
Both menu items display the the "Set Style" dialog box.
Select menu item "" and use the "Set Style" dialog box to add a pink hatch background pattern to all elements matching any unselected profile.
Save newly created profile set editions.profiles
Open export_pdf.dita and associate profile set editions.profiles to this DITA topic.
This association is done using menu item → → . This menu item displays the "Select Profile" dialog box. This dialog box lets the user associate the document being edited to a set of profile with no specific profile selected or to a specific profile contained in a profile set.
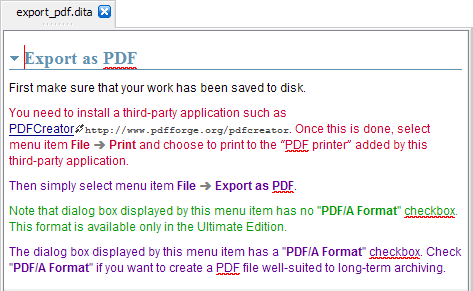
Given the styles specified in editions.profiles, the styled view of document export_pdf.dita will look like follows.
Set the product profiling attribute on paragraphs #2 to #4 of editions.profiles as shown in this screen.
This is done using menu item → → . This menu item displays the "Set Profiling Attributes" dialog box allowing to add, remove or replace one or more profiling attributes to/from the implicitly or explicitly selected element.
Note that if you prefer to set the product attribute “by hand” using the Attributes tool and make a typo for an attribute value, this typo will be reported as a semantic warning by XMLmind XML Editor and an error message[2] will be displayed by the Validity tool.
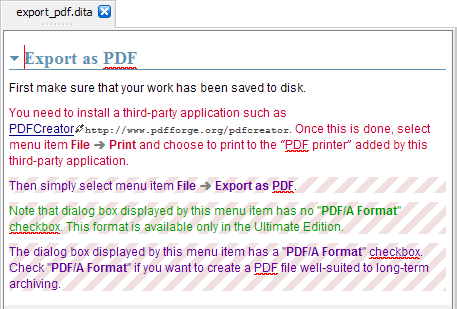
Select the profile called "lite" using → → .
Given the styles specified in editions.profiles, the styled view of document export_pdf.dita will look like follows.
Generate the PDF file corresponding to the Lite edition, normally, using → → .
There is no special parameter to pass to the DITA processor or to the XSLT stylesheet. If you want to generate the PDF file corresponding to the Professional edition, simply select the profile called "pro" using → → and rerun . Same procedure for generating the PDF file corresponding to the Ultimate edition.
The sample map found in sample/user_guide.ditamap references just 2 topics sample/export_pdf.dita and sample/advanced_features.dita. What if this map contained hundreds of topics? Would the author have to associate the ".profiles" file to each of these topics? Fortunately the answer is no. Suffice to associate the ".profiles" file[3] to the map and to check → in XMLmind XML Editor - Online Help. When this is done, all the topics which are part of the deliverable created by this map automatically “inherit” the chosen conditional processing profile.
The same approach applies to DocBook 5.1 assemblies and to DocBook documents. For example, do not associate the ".profiles" file to each chapter document. Instead associate the ".profiles" file to the modular book.
The same approach applies to Ebooks. For example, do not associate the ".profiles" file to each ebook page. Instead associate the ".profiles" file to the ebook specification.
| | | |
| 2. Working with conditional processing profiles without the facilities added by the "Easy Profiling" add-on |  | 4. About ".profiles" files |
![[Tip]](images/tip.svg)