| Chapter 2. Getting started with XMLmind XML Editor | ||
|---|---|---|
 | Part I. Getting started |  |
| Chapter 2. Getting started with XMLmind XML Editor | ||
|---|---|---|
| | Part I. Getting started | |
There are a few things you need to learn before starting to use XMLmind XML Editor (XXE for short).
XXE is quite straightforward to use but you simply cannot guess how it works. While what you see resembles your typical word processor, XXE does not work like a word processor, nor like a text editor, neither like other XML editors. Therefore this chapter is really a must read.
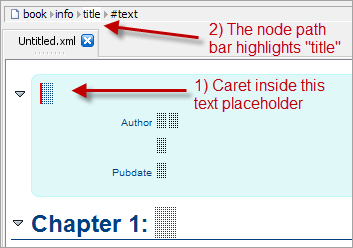
Patterns looking like this  are text placeholders. You can click into (or tab to) such placeholders and start typing.
The node path bar, found above the document view, indicates what is selected or when there is no explicit selection, the element containing the caret.
XXE has 2 different kinds of selection, the text selection and the node selection.
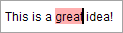
The text selection, which is given a pink background color, works like in any word processor or text editor. Few editing commands apply to the text selection: → , → . For example, you can convert the text selection to a bold or italic inline element.
The node selection looks different than the text selection: a thin red frame is drawn around the selected nodes. The simplest way to select a node is to click on its name in the node path bar.
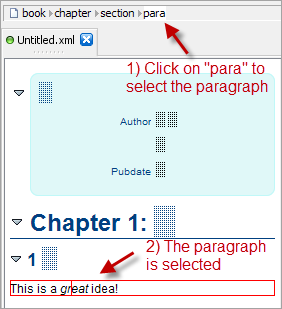
Most editing commands apply to the node selection.
The node selection may comprise several sibling nodes, for example, two contiguous paragraphs. The easiest way to extend the node selection is to Shift-click before or after the thin red frame.
The element directly containing the caret is always implicitly selected: no thin red frame around it.
For example if you want to insert a table before a paragraph, first click inside this paragraph (but not inside any of its child elements, as this would implicitly select the child element) and then use → .
However, if you want to insert a list after a table, you cannot do that using the implicit element selection because a table cannot directly contain some text. You'll have to first explicitly select this table (e.g. by clicking on "table" in the node path bar) and then use → .
Notice that the two editing commands mentioned above are → , → . XXE also has less commonly used → editing command.
Insert an element (or text node) just before the node selection.
Insert an element right here, at caret position.
Insert an element (or text node) just after the node selection.
![[Important]](images/important.svg) | |
Note that XXE does not work like other XML editors. In other XML editors,
|
For the same reasons, XXE has 3 paste commands and not just one: → , → , → . Unlike → , → is commonly used and works as expected by replacing the text or node selection with the contents of the clipboard.
When XXE, which is a strictly validating XML editor, does not allow you to perform the editing command you want, it's almost always because you didn't select the right object and/or you are not using the right editing command.
For example, you have clicked inside a paragraph and attempt to use → to add a section after it. This cannot work because a paragraph section contain a chapter. Instead, first select the section which is the ancestor of the paragraph (e.g. click "section" in the node path bar) then use → (not → ) and select "section" from the list.
Watch the  screencast corresponding to what's explained above.
| |  | |
| 2. Contents of the installation directory |  | Part II. Reference |