XMLmind Word To XML Manual
Explains how to install and use XMLmind Word To XML (w2x for short), how to customize the output of w2x and how to embed a w2x processor in a Java™ application.
Hussein Shafie
XMLmind Software
35 rue Louis Leblanc,
78120 Rambouillet,
France,
Phone: +33 (0)9 52 80 80 37,
Web: www.xmlmind.com/w2x/
Email: mailto:w2x-support@xmlmind.com (public mailing list)
Contents
2.1 Contents of the installation directory 7
3 Alternatives to using the w2x command-line utility 9
3.1 The w2x-app graphical application 9
3.2 The “Word To XML” add-on for XMLmind XML Editor 9
3.2.1 Installing the “Word To XML” add-on 10
3.3 The “Word To XML” servlet 10
3.3.1 Contents of the servlet software distribution 11
3.3.2 Installing the servlet 11
3.3.3 Configuring the servlet 11
3.3.4 Using the servlet to convert DOCX files 12
3.3.5 Non interactive requests 13
4.1 How to generate useful multi-page HTML 17
6 Customizing the output of w2x 24
6.1 Customizing the XHTML+CSS files generated by w2x 24
6.1.1 Using a XED script to modify the styles embedded in the XHTML+CSS file 24
6.1.2 Appending custom styles to the styles embedded in the XHTML+CSS file 24
6.1.3 Using an external CSS file rather than embedded CSS styles 25
6.1.4 Combining all the above methods 26
6.2 Customizing the semantic XML files generated by w2x 27
6.2.1 Converting custom character styles to semantic tags 27
6.2.2 Converting custom paragraph styles to semantic tags 28
6.3 Generating XML conforming to a custom schema 33
6.4 Packaging your customization as a w2x plugin 34
6.4.2 Registering a plugin with w2x 35
7 The w2x command-line utility 37
7.1 Variables substituted in the parameter values passed to the –p and –pu options 40
7.2 Default conversion steps 41
7.3 Automatic conversion step parameters 41
8 Conversion step reference 42
9 Embedding w2x in a Java™ application 66
9.1.1 Custom conversion step 67
9.1.2 Custom image converters 67
9.1.2.1 Specifying an external image converter 69
9.1.2.2 Controlling how image files found in the input DOCX file are converted to standard formats 69
10 Limitations and implementation specificities 71
Introduction
Microsoft® Word is an amazing popular writing tool. However, its main drawback is that, once your document is complete, you cannot do much with it: print it, convert it to PDF or send it as is by email.
XMLmind Word To XML aims no less than to suppress Microsoft® Word main drawback. This 100% Java™ software component allows to automate the publishing —in its widest sense— of contents created using Microsoft® Word 2007+.
More precisely, XMLmind Word To XML (w2x for short) allows to automatically convert DOCX files to:
Clean, styled, valid XHTML+CSS, looking very much like the source DOCX files.
Because the generated XHTML+CSS file is clean and valid, you can easily restyle it, extract metadata or an abstract from it before publishing it.
Unstyled, valid, semantic XML (DITA, DocBook, XHTML, your custom schema, etc).
In this case, most styles are converted to semantic tags. For example, numbered paragraphs are converted to proper ordered lists.
Generating semantic XML out of DOCX files is useful for interchange reasons (e.g. implement open data) or because you want to port your existing documentation to a structured document format where form and content are completely separated (e.g. implement single source publishing).
Of course, deploying w2x does not require installing MS-Word on the machines hosting the software. Also note that w2x does not require the authors to change their habits while using MS-Word: no strict writing discipline, no specific styles, no specific document templates, no specific macros, etc.
This document explains:
how to install and use w2x;
how to customize the output of w2x;
because w2x has been designed to be easily embedded in any Java, desktop or server-side, application, how to embed a w2x processor in a Java application.
Installing w2x
Requirements
XMLmind Word To XML (w2x for short) requires a Java™ runtime 11+. However, w2x is officially supported by XMLmind only on Windows 8.1, 10 and 11, macOS (Intel® or ARM® processor) 15.x (Sequoia) and 26.x (Tahoe) and Linux.
On Linux, make sure that the Java bin/ directory is referenced in the $PATH and, at the same time, check that the Java runtime in the $PATH has the right version:
$ java –version
openjdk version "26.0.1" 2026-04-21
OpenJDK Runtime Environment (build 26.0.1+8-34)
OpenJDK 64-Bit Server VM (build 26.0.1+8-34, mixed mode)
On Windows and on the Mac, this verification is in principle not needed as the java executable is automatically found in the $PATH when Java has been properly installed.
Install on Windows
Download the setup.exe distribution.
Double-click on the setup.exe file to launch the installer.
Follow the instructions of the installer.
About Java on Windows
The setup.exe distribution includes a very recent —generally the most recent— private OpenJDK Java™ runtime. Therefore, you don't need to install Java on your computer. Moreover, if you have Java already installed on your computer, then your public Java runtime will be ignored by w2x.
If you prefer to run w2x using a different version of Java, you'll have to first delete folder W2X_INSTALL_DIR\bin\jre64\ in order to force w2x to use the version of Java installed on your computer.
Note that W2X_INSTALL_DIR\bin\jre64\ contains a 64-bit version of the Java runtime which cannot be used on a 32-bit version of Windows. This means that, on a 32-bit version of Windows, you'll still have to download and install a 32-bit Java™ 8+ runtime on your computer in order to use w2x.
Install on the Mac
Download the .dmg distribution.
Double-click the downloaded .dmg file to open it in the Finder.
Copy the WordToXML.app folder, an application bundle represented by icon ![]() , anywhere you want. For example, drag&drop this icon to the /Applications folder or to your desktop.
, anywhere you want. For example, drag&drop this icon to the /Applications folder or to your desktop.
Start the w2x-app desktop application by double-clicking on the ![]() icon (or use the Launchpad).
icon (or use the Launchpad).
The first time w2x-app is started, your Mac will generally ask you to confirm that you actually want to open an application downloaded from the Internet. Click Open to confirm.
Don't worry, w2x-app has been digitally signed using a certificate issued by Apple itself. This confirmation is required for any digitally signed application not coming from the App Store.
Move the downloaded .dmg file to the Trash.
About Java on the Mac
The .dmg distribution includes a very recent —generally the most recent— private OpenJDK Java™ runtime. Therefore, you don't need to install Java on your computer. Moreover, if you have Java already installed on your computer, then your public Java runtime will be ignored by w2x.
If you prefer to run w2x using a different version of Java, you'll have to first delete folder WordToXML.app/Contents/Resources/w2x/bin/jre/ in order to force w2x to use the version of Java installed on your computer.
Manual install on any Java 11+ platform (Windows, Mac, Linux, etc)
Unzip the .zip distribution in any directory you want.
C:\> unzip w2x-1_14_1.zip
C:\> cd w2x-1_14_1
C:\w2x-1_14_1> dir
... <DIR> bin
... <DIR> doc
... <DIR> legal
...
XMLmind Word To XML is intended to be used directly from the w2x-1_14_1/ directory. That is, you can run the w2x command by simply executing (in a Command Prompt on windows, a terminal on Linux):
C:\w2x-1_14_1> bin\w2x
Usage: w2x [-version] [-v|-vv|-vvv] [Options]
in_docx_file out_file
| -batch out_spec in_docx_file1 ... in_docx_fileN
| -printenv
| -liststeps
-version
Print version number and exit.
…
Use '-?' to list options.
Contents of the installation directory
If the .dmg distribution has been used to install XMLmind Word To XML on the Mac, the following subdirectories are found in WordToXML.app/Contents/Resources/w2x/.
bin/w2x, w2x.bat
Scripts used to run XMLmind Word To XML (w2x for short). Use w2x on any Unix system. Use w2x.bat on Windows.
bin/w2x-app.exe, w2x-app.jstart
File w2x-app.exe is used to start w2x-app, a graphical application easier to use than the w2x command-line utility, on Windows. This .exe file is a home-made launcher parameterized by xxe.jstart, an UTF-8 encoded, plain text file.
bin/w2x-app, w2x-app-c.bat
Scripts used to run w2x-app, a graphical application easier to use than the w2x command-line utility. Use w2x-app on any Unix system. Use w2x-app-c.bat on Windows , but only when you need to start w2x-app with a console. On Windows, a console is needed to be able to see low-level error messages.
doc/index.html
Contains the documentation of w2x.
doc/manual/
Contains XMLmind Word To XML Manual. This document is available in source DOCX format, in PDF format and in all the output formats supported by w2x.
doc/manual/conv_manual.sh, conv_manual.bat
Scripts allowing to convert XMLmind Word To XML Manual to all the output formats supported by w2x. The files generated by these scripts are found in doc/manual/out/.
doc/xedscript/
Contains The XED scripting language.
doc/w2x_app_help/
Contains the online help of w2x-app, a graphical application which is easier to use than the w2x command-line utility.
doc/api/
Contains the reference manual of the Java™ API of w2x (generated using javadoc).
legal/, legal.txt
Contains legal information about w2x and about third-party components used in w2x.
lib/
All the (non-system) Java™ class libraries needed to run w2x:
xmlresolver.jar: an enhanced XML resolver with XML Catalog support.
saxon.jar: The Saxon 6.5.5 XSLT 1.0 engine.
w2x_all.jar: self-contained JAR containing everything needed to run w2x, that is, all the other JAR files and also all the scripts and the stylesheets found in subdirectories xed/ and xslt/.
w2x.jar: contains the w2x engine.
w2x_rt.jar: contains a runtime needed by the w2x engine. All these classes come from XMLmind XML Editor.
wmf2svg.jar: WMF to SVG Converting Tool & Library; needed to support the WMF and EMF picture formats.
wmf_converter.jar: contains a picture format plug-in based on wmf2svg.jar.
whc.jar: contains the XMLmind Web Help Compiler engine.
snowball.jar: Snowball is used by XMLmind Web Help Compiler to implement stemming.
plugin/
An empty directory where user plugins are to be copied in order to be automatically registered with w2x.
sample_plugins/rss/
sample_plugins/wh5_zip/
The two sample plugins used as examples in this document. The rss/src/ subdirectory contains the Java™ source code of rss/date_util.jar (custom support code). The wh5_zip/src/ subdirectory contains the Java™ source code of wh5_zip/zip_step.jar (custom conversion step).
xed/
Contains the XED scripts used to convert styles to semantic XHTML tags.
xslt/
Contains the XSLT 1.0 stylesheets used to generate semantic XML.
Alternatives to using the w2x command-line utility
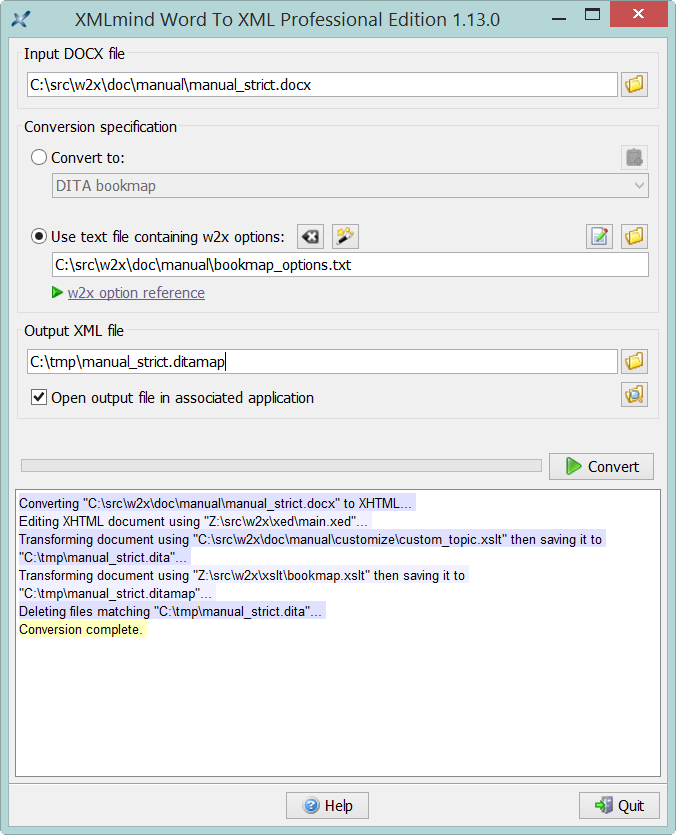
The w2x-app graphical application
Graphical application w2x-app should be easier to use than the w2x command-line utility. This application is found in w2x_install_dir/bin/. How to use it is explained in w2x-app - Online Help.
Figure 1 w2x-app window
The “Word To XML” add-on for XMLmind XML Editor
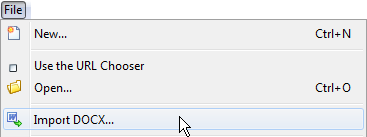
Graphical application w2x-app is also available as an add-on for XMLmind XML Editor. This add-on adds an "Import DOCX" item to the File menu. The "Import DOCX" menu item displays a non-modal dialog box almost identical to w2x-app. XML output files created using the "Import DOCX" dialog box are automatically opened in XMLmind XML Editor.
As of version 9.1, the “Word To XML” add-on is included in all the software distributions of XMLmind XML Editor. Therefore following the instructions below is probably not needed. However please note that, when part of XMLmind XML Editor Personal Edition, this add-on runs in “evaluation mode”, that is, it generates output containing random words replaced by string "[XMLmind]").
Installing the “Word To XML” add-on
This add-on is compatible with latest version of XMLmind XML Editor. In order to install it, please proceed as follows:
Start XMLmind XML Editor.
Select Options→Install Add-ons. This displays the “Install Add-ons” dialog box.
In the Install tab, click the checkbox found before the table row containing “Word To XML”.
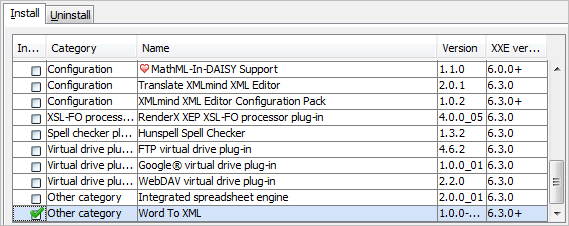
Click OK to download and install the “Word To XML” add-on.
Restart XMLmind XML Editor as instructed.
Notice that the File menu has now an “Import DOCX” item.
The “Word To XML” servlet
The “Word To XML” servlet is a Java™ Servlet (server-side standard component) which has the same functions as the w2x-app desktop application.
Because it’s a server-side component and not a desktop application, please do not attempt to deploy the “Word To XML” servlet if you are an end-user of “Word To XML”. Please ask your IT personnel to do that for you.
Contents of the servlet software distribution
The “Word To XML” servlet comes in a software distribution of its own: w2x_servet-1_14_1.zip. This distribution contains a ready-to-deploy binary w2x.war, as well as the full Java™ source code of the servlet.
w2x.war
Ready-to-deploy Web application ARchive (WAR) containing the servlet.
src/
src/build.xml
The Java™ source code of the servlet. Run ant in src/ in order to use src/build.xml to rebuild w2x.war.
w2x/
Directory containing unpacked w2x.war. Needed to rebuild w2x.war.
lib/
Contains Java™ libraries needed to rebuild w2x.war.
Installing the servlet
File w2x.war may be easily installed in any servlet container implementing at least the Servlet 2.3 standard. Example of such servlet containers: Apache Tomcat, Jetty, Caucho Resin.
About Apache Tomcat version 10 and above
Beware that there is a major breaking change between latest versions of Apache Tomcat (>= 10) and older versions (<= 9). This is documented in this migration article.
To make a long story short, if you need to deploy the “Word To XML” servlet on Tomcat version 10+, then you first must create a webapps-javaee/ folder next to TOMCAT_INSTALL_DIR/webapps/ then copy w2.war to this TOMCAT_INSTALL_DIR/webapps-javaee/.
Though copying file w2x.war to the webapps/ folder of the servlet container and then restarting the servlet container is generally sufficient to deploy the “Word To XML” servlet, please refer to the documentation your servlet container to learn about the best deployment procedure.
On Windows, the .dll files contained in w2x_servlet_deployment_dir\WEB-INF\lib\ must be copied to a directory referenced by the PATH environment variable of the computer running the servlet.
Configuring the servlet
The “Word To XML” servlet is configured by specifying a number of init-param parameters. These parameters are found in WEB-INF/web.xml, where folder WEB-INF/ is contained in w2x.war.
All these init-param parameters are documented in web.xml. Example, parameter workDir:
<!-- workDir =============================================================
Uploaded files and files generated during the conversion process
are stored in temporary subdirectories of this directory.
If specified directory does not exist, it will be created.
Value: this directory and its contents must be readable and writable
by the operating system account used to run the Word To XML servlet.
Default: dynamic; supplied by the Servlet Container.
====================================================================== -->
<init-param>
<param-name>workDir</param-name><param-value></param-value>
</init-param>
Using the servlet to convert DOCX files
Let’s suppose your servlet container runs on host localhost and uses 8080 as its port. In order to use the “Word To XML” servlet, please point your Web browser to http://localhost:8080/w2x/. This will cause the browser to display a page containing a simple DOCX convert form.
Figure 2 The Convert DOCX form (servlet container running on host 192.168.1.202 and using port 8080)
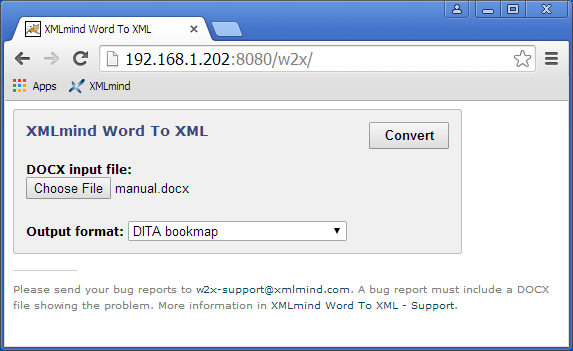
In order to convert a DOCX file to another format:
Click “Choose File” to select the DOCX file to be converted.
Select the desired output format using the “Output format” combobox.
Click Convert to download a .zip (or .epub) archive containing the result of the conversion. Generating this .zip (or .epub) file may take several seconds to several minutes depending on the size of the DOCX input file.
If the name of the DOCX input file contains non-ASCII characters (e.g. accented characters), please make sure to use Zip extractor software supporting .zip files having UTF-8 encoded filenames.
Note that most Zip extractor software do not support .zip files having UTF-8 encoded filenames1. Such extractors will succeed in unpacking the .zip file, but will generate files having incorrect names.
Non interactive requests
It’s also possible to use the conversion services of the “Word To XML” servlet by sending URL /w2x/convert an HTTP POST request having a multipart/form-data encoding.
curl -s -S -o manual_docbook5.zip \
-F "docx=@manual.docx;type=application/vnd.openxmlformats-officedocument.wordprocessingml.document" \
-F "conv=docbook5" \
http://localhost:8080/w2x/convert
Other example:
curl -s -S -o manual.epub \
-F "docx=@manual.docx;type=application/vnd.openxmlformats-officedocument.wordprocessingml.document" \
-F "conv=epub" \
-F "params=-p epub.identifier urn:x-mlmind:w2x:manual -p epub.split-before-level 8" \
http://localhost:8080/w2x/convert
The conversion request has three emulated form fields:
docx
Emulated <input type=”file”> field. Required. Contains the DOCX input file.
conv
Emulated <input type=”text”> field. Required. Contains the name of one of the conversionN.name init-param defined in WEB-INF/web.xml.
The stock WEB-INF/web.xml defines the following conversions to styled HTML:
xhtml_css (single page styled HTML), frameset (multi-page styled HTML, split on Heading 1), frameset2 (multi-page styled HTML, split on Heading 1, 2), frameset3 (multi-page styled HTML, split on Heading 1, 2, 3), webhelp (split on Heading 1), webhelp2 (split on Heading 1, 2), webhelp3 (split on Heading 1, 2, 3), epub (split on Heading 1), epub2 (split on Heading 1, 2), epub3 (split on Heading 1, 2, 3)
and also the following conversions to “semantic” XML:
docbook, docbook5, topic, map, bookmap, xhtml_strict, xhtml_loose, xhtml1_1, xhtml5.
params
Emulated <input type=”text”> field. Optional. Contains some w2x command-line options, generally -p parameters. These options are appended to the options of the conversion specified in the conv emulated form field.
The response to a successful conversion request is a .zip (or .epub) archive containing the result of the conversion.
Getting started with w2x
About Evaluation Edition
Note that Evaluation Edition is useless for any purpose other than evaluating XMLmind Word To XML. This edition generates output containing random words replaced by string "[XMLmind]". (Of course, this does not happen with Professional Edition!)
We’ll use this manual to explain the basic uses of the w2x command-line utility. This manual is found in DOCX format in w2x_install_dir/doc/manual/ and the w2x command-line utility is found in w2x_install_dir/bin/.
C:\w2x-1_14_1> cd doc\manual
C:\w2x-1_14_1\doc\manual> mkdir out
Convert manual.docx to out\manual.xhtml, containing clean, styled, valid XHTML+CSS, looking very much like manual.docx:
..\..\bin\w2x manual.docx out\manual.xhtml
If you want to generate XHTML which is treated by Web browsers as if it were HTML, simply use a .html file extension for the output file:
..\..\bin\w2x manual.docx out\manual.html
Doing this automatically turn on options3 which remove the XML declaration (<?xml version=”1.0” encoding=”UTF-8”?>) normally found at the top of an XHTML file and insert a <meta content=”text/html; charset=UTF-8” http-equiv=”Content-Type”/> into the html/head element of the output document.
Convert manual.docx to out\frameset\manual.xhtml, containing multi-page, clean, styled, valid XHTML+CSS, looking very much like manual.docx:
..\..\bin\w2x –o frameset manual.docx out\frameset\manual.xhtml
The above command generates multiple “.xhtml” files in the out\frameset directory which is automatically created4 if needed to.
Note that out\frameset\manual.xhtml contains a frameset. While an obsolete HTML feature, a frameset makes it easy browsing the generated XHTML+CSS pages. Moreover the table of contents used as the left frame, found in out\frameset\manual-TOC.xhtml, is a convenient way to programmatically list all the generated XHTML+CSS pages.
Convert manual.docx to out\webhelp\manual.html, containing a Web Help looking very much like manual.docx:
..\..\bin\w2x –o webhelp manual.docx out\webhelp\manual.html
The above command generates multiple “.html” files in the out\webhelp directory which is automatically created if needed to.
Convert manual.docx to out\manual.epub, containing a EPUB 2 book looking very much like manual.docx:
..\..\bin\w2x –o epub manual.docx out\manual.epub
Convert manual.docx to out\manual.xml, containing DocBook 4.5.
..\..\bin\w2x –o docbook manual.docx out\manual.xml
Convert manual.docx to out\manual.xml, containing DocBook 5.0.
..\..\bin\w2x –o docbook5 manual.docx out\manual.xml
By default, the generated DocBook files contain HTML tables. If you prefer DocBook to contain CALS tables, please use the following options:
..\..\bin\w2x –o docbook5¬
-p convert.set-column-number yes -p transform.cals-tables yes¬
manual.docx out\manual.xml
Convert manual.docx to out\manual.xml, containing a DocBook V5.1 assembly.
..\..\bin\w2x –o assembly manual.docx out\manual.xml
Convert manual.docx to out\manual.dita, containing a DITA topic.
..\..\bin\w2x –o topic manual.docx out\manual.dita
Generating a task having “MyTask” as its ID is equally simple:
..\..\bin\w2x –o topic¬
-p transform.topic-type task -p transform.root-topic-id MyTask¬
manual.docx out\manual.dita
Convert manual.docx to out\manual.ditamap, containing a DITA map.
..\..\bin\w2x –o map manual.docx out\manual.ditamap
Convert manual.docx to out\manual.ditamap, containing a DITA bookmap possibly having chapter topicrefs and nested topicrefs acting as sections and subsections (but no sub-subsections).
..\..\bin\w2x –o bookmap -p transform2.section-depth 3¬
manual.docx out\manual.ditamap
Convert manual.docx to out\manual.xhtml, containing “semantic”, unstyled XHTML5.
..\..\bin\w2x –o xhtml5 manual.docx out\manual.xhtml
Use the following options to generate other versions of semantic XHTML:
Option | XHTML Version |
-o xhtml_strict | XHTML 1.0 Strict |
-o xhtml_loose | XHTML 1.0 Transitional |
-o xhtml_1 | XHTML 1.1 |
-o xhtml5 | XHTML 5.0 |
How to generate useful multi-page HTML
In order to generate multi-page HTML, that is, frameset, Web Help, EPUB, we need to automatically split the source DOCX document into parts.
A new part is created each time a paragraph having an outline level less than or equal to specified split-before-level parameter is found in the source. An outline level is an integer between 0 (e.g. style “Heading 1”) and 8 (e.g. style “Heading 9”). The default value of parameter split-before-level is 0, which means: for each “Heading 1”, create a new page starting with this “Heading 1”.
Frameset example: for each “Heading 1” and “Heading 2”, create a new page (out/frameset/manual-1.xhtml, out/frameset/manual-2.xhtml, ..., out/frameset/manual-N.xhtml) starting with this “Heading 1” or “Heading 2”:
..\..\bin\w2x -p split.split-before-level 1¬
–o frameset manual.docx out\frameset\manual.xhtml
EPUB example:
..\..\bin\w2x -p epub.split-before-level 1¬
–o epub manual.docx out\manual.epub
Web Help containing “semantic” XHTML 5 example:
..\..\bin\w2x -p webhelp.split-before-level 1¬
–o webhelp5 manual.docx out\webhelp\manual.html
Important tip
Generating any of the multi-page, styled HTML formats should work great if, for the DOCX document to be converted, you can use MS-Word's "References > Table of Contents" button to automatically create a table of contents.
Note that the source DOCX document is not required to have a table of contents, but MS-Word should allow to automatically create a good one.
In other words, automatically creating a table of contents using MS-Word is the best way to check that your outline levels are OK.
Going further with w2x
When you execute the following command:
..\..\bin\w2x –o docbook5 manual.docx out\manual.xml
you execute in fact a sequence of 3 conversion steps:
Convert the DOCX file to a styled, valid, XHTML 1.0 Transitional document, looking very much like the input DOCX file.
Apply a number of XED scripts to this document to convert CSS styles into semantic tags. For example, numbered paragraphs are converted to proper ordered lists .
The entry point of these “semantic” XED scripts is found in w2x_install_dir/xed/main.xed.
The XED scripts edit in place the input XHTML document. Therefore, the result of this step is the same XHTML document, still valid, but this time, containing no CSS styles whatsoever.
Apply an XSLT 1.0 stylesheet to the unstyled, valid, XHTML 1.0 Transitional document in order to generate the desired semantic XML format.
The XSLT stylesheets are all found in w2x_install_dir/xslt/. In the above case, we want to generate DocBook v5, therefore we use w2x_install_dir/xslt/docbook5.xslt.
This sequence of conversion steps can be made visible in every detail by specifying the –vv option (very verbose) :
..\..\bin\w2x –vv –o docbook5 manual.docx out\manual.xml
VERBOSE: Converting "manual.docx" to XHTML...
DEBUG: convert.xhtml-file=C:\w2x-1_14_1\doc\manual\out\manual.xhtml
VERBOSE: Editing XHTML document using "C:\w2x-1_14_1\xed\main.xed"...
DEBUG: edit.xed-url-or-file=file:/C:/w2x-1_14_1/xed/main.xed
DEBUG: Loading script "file:/C:/w2x-1_14_1/xed/main.xed"...
DEBUG: Loading script "file:/C:/w2x-1_14_1/xed/after-translate.xed"...
[...]
DEBUG: Loading script "file:/C:/w2x-1_14_1/xed/before-save.xed"...
VERBOSE: Transforming document using "C:\w2x-1_14_1\xslt\docbook5.xslt" then saving it to "C:\w2x-1_14_1\doc\manual\out\manual.xml"...
DEBUG: transform.out-file=C:\w2x-1_14_1\doc\manual\out\manual.xml transform.xslt-url-or-file=file:/C:/w2x-1_14_1/xslt/docbook5.xslt
[...]
In fact, option –o docbook5 is a shorthand for the following w2x command-line options:
-c
Execute a Convert step called “convert”.
-p convert.xhtml-file C:\w2x-1_14_1\doc\manual\out\manual.xhtml
Pass the above xhtml-file parameter to the conversion step called “convert”.
-e
Execute an Edit step called “edit”.
-p edit.xed-url-or-file file:/C:/w2x-1_14_1/xed/main.xed
Pass the above xed-url-or-file parameter to the conversion step called “edit”.
-t
Execute a Transform step called “transform”.
-p transform.xslt-url-or-file file:/C:/w2x-1_14_1/xslt/docbook5.xslt
-p transform.out-file C:\w2x-1_14_1\doc\manual\out\manual.xml
Pass the above xslt-url-or-file and out-file parameters to the conversion step called “transform”.
If you need to learn about the details of the conversion steps to be executed, the simplest is to use the –liststeps command-line option.
Example: w2x –o docbook5 –liststeps.
The order of the –c, -e and –t options is significant because it means: first convert, then edit and finally transform. The order of the –p (and –pu) options is not important, as a parameter name must be prefixed by the name of the step to which it applies.
The Convert, Edit and Transform steps are the most important steps. There are other conversion steps though, which are all documented in chapter Conversion step reference. Moreover a Java™ programmer may implement its own custom conversion steps5 and instruct the w2x command-line to give them names (required to pass them parameters) and to execute them. See option –step.
A w2x processor executes a sequence of conversion steps whatever the output format. Simply the conversion steps, their order, number and parameters, depend on the desired output format. This is depicted in the figure below.
Figure 3 Anatomy of a w2x processor

The first sequence of in the above figure reads as follows: in order to convert a DOCX file to styled XHTML, first convert the DOCX file to a XHTML+CSS document, then “polish up” this document (e.g. process consecutive paragraphs having identical borders) using XED script w2x_install_dir/xed/main-styled.xed, and finally save the possibly modified XHTML+CSS document to disk.
Stock XED scripts
XMLmind Word to XML comes with two stock “main” XED scripts:
w2x_install_dir/xed/main-styled.xed
Invokes XED scripts used to “polish up” the styled XHTML 1.0 Transitional document created by the Convert step (e.g. process consecutive paragraphs having identical borders).
w2x_install_dir/xed/main.xed
Invokes XED scripts used to prepare the generation of semantic XML of all kinds: XHTML, DocBook, DITA. These scripts leverage the CSS styles and classes found in the styled XHTML 1.0 Transitional document created by the Convert step. They translate these CSS styles and classes (e.g. numbered paragraph) into semantic tags (e.g. ol/li).
Both the above “main” XED scripts are organized as sequences of simpler, short, XED scripts. Using –p or –pu options, these short scripts may be replaced or removed and may be passed parameters. It’s also possible to insert custom scripts before or after any of these short scripts.
Excerpts from w2x_install_dir/xed/main-styled.xed:
script(defined("before.init-styles", ""));
script(defined("do.init-styles", "init-styles.xed"));
script(defined("after.init-styles", ""));
script(defined("before.title-styled", ""));
script(defined("do.title-styled", "title-styled.xed"));
script(defined("after.title-styled", ""));
script(defined("before.remove-pis", ""));
script(defined("do.remove-pis", "remove-pis.xed"));
script(defined("after.remove-pis", ""));
script(defined("before.expand-tabs", ""));
script(defined("do.expand-tabs", "expand-tabs.xed"));
script(defined("after.expand-tabs", ""));
script(defined("before.borders", ""));
script(defined("do.borders", "borders.xed"));
script(defined("after.borders", ""));
script(defined("before.number-footnotes", ""));
script(defined("do.number-footnotes", "number-footnotes.xed"));
script(defined("after.number-footnotes", ""));
script(defined("before.finish-styles", ""));
script(defined("do.finish-styles", "finish-styles.xed"));
script(defined("after.finish-styles", ""));
Examples:
Remove script title-styled.xed:
-p edit.do.title-styled “”
Replace script borders.xed by custom script “C:\Users\john\w2x tests\MyBorders.xed”:
-pu edit.do.borders “C:\Users\john\w2 tests\MyBorders.xed”
Pass parameter finish-styles.css-uri to script finish-styles.xed:
-p edit.finish-styles.css-uri css/manual.css
By convention (this is not strictly required), the name of a parameter which applies to a given XED script is prefixed with the basename without any file extension of this script. Hence the full names of most parameters of Edit steps have the following syntax: step_name.script_name.parameter_name. Examples:
-p edit.prune.preserve “p-ProgramListing”
-p edit.inlines.convert “c-Code code”
Execute script customize\patch_manual.xed before script finish-styles.xed:
-pu edit.before.finish-styles customize\patch_manual.xed
Execute script customize\patch_manual.xed after script borders.xed:
-pu edit.after.borders customize\patch_manual.xed
Customizing the output of w2x
Customizing the XHTML+CSS files generated by w2x
Using a XED script to modify the styles embedded in the XHTML+CSS file
By default, w2x adds a number of CSS rules to the /html/head/style element of the generated XHTML+CSS file. Example: excerpts from w2x_install_dir/doc/manual/manual.html:
<style type="text/css">
body {
counter-reset: n-1-0 0 n-1-1 0 n-1-2 0 n-17-0 0 n-20-0 0;
font-family: Calibri;
font-size: 11pt;
}
...
</style>
A XED script allows to modify, not only the nodes of an XHTML document, but also its “CSS styles”. These “CSS styles” may be either style properties contained in the style attribute of an element or class names found in the class attribute of an element or the CSS rules of the document.
Therefore, when the desired customization is limited, suffice to execute a XED script in order to modify the XHTML+CSS document created by the Convert step. Example:
w2x -pu edit.before.finish-styles customize\patch_manual.xed¬
manual.docx out\manual.html
where w2x_install_dir/doc/manual/customize/patch_manual.xed contains:
set-rule(".p-ProgramListing", "white-space", "pre");
The above line adds CSS property “white-space: pre;” to the CSS rule having “.p-ProgramListing” as its selector. This CSS rule corresponds to custom paragraph6 style called “ProgramListing”.
Besides XED command set-rule, the following commands allow to edit the CSS styles contained in the XHTML+CSS document created by the Convert step: add-class, add-rule, remove-class, remove-rule, set-style.
Appending custom styles to the styles embedded in the XHTML+CSS file
XED script w2x_install_dir/xed/finish-styles.xed has a optional custom-styles-url-or-file parameter which makes it easy customizing the automatically generated CSS styles.
This parameter may be used to specify the location of a CSS file. The custom CSS styles found in specified file are simply appended to the automatically generated CSS styles. Example:
Example:
w2x -pu edit.finish-styles.custom-styles-url-or-file customize\custom.css¬
manual.docx out\manual_restyled.html
where customize\custom.css contains:
body {
font-family: sans-serif;
}
.p-Heading1,
.p-Heading2,
.p-Heading3,
.p-Heading4,
.p-Heading5,
.p-Heading6 {
font-family: serif;
color: #17365D;
padding: 1pt;
border-bottom: 1pt solid #4F81BD;
margin-bottom: 10pt;
margin-left: 0pt;
text-indent: 0pt;
}
.p-Heading1 {
border-bottom-width: 2pt;
}
...
.c-FootnoteReference,
.c-EndnoteReference {
font-size: smaller;
}
Using an external CSS file rather than embedded CSS styles
XED script w2x_install_dir/xed/finish-styles.xed has a optional css-uri parameter which allows to specify the CSS file where all CSS rules, whether automatically generated or custom, are to be saved.
Same example as above but using an external CSS file rather than embedded CSS styles:
w2x -p edit.finish-styles.css-uri manual_restyled_css/manual.css¬
-pu edit.finish-styles.custom-styles-url-or-file customize\custom.css¬
manual.docx out\manual_restyled.html
All the CSS styles, whether automatically generated or the custom ones found in customize\custom.css, end up in manual_restyled_css\manual.css. Moreover, out\manual_restyled.html contains a link to manual_restyled_css\manual.css.
<link href="manual_restyled_css/manual.css"
rel="stylesheet" type="text/css"/>
Combining all the above methods
It is of course possible to combine all the above methods. For example, the following w2x command is used to create w2x_install_dir/doc/manual/manual_restyled.html:
w2x -pu edit.before.finish-styles customize\patch_manual_restyled.xed¬
-p edit.finish-styles.css-uri manual_restyled_css/custom.css¬
-pu edit.finish-styles.custom-styles-url-or-file customize\custom.css¬
manual.docx out\manual_restyled.html
where w2x_install_dir/doc/manual/customize/patch_manual_restyled.xed contains:
for-each /html/body/p[get-class("^p-Heading\d$")] {
set-variable("class", get-class("^n-\d+-\d+$"));
if $class != '' {
set-variable("selector", concat(".", $class, ":after"));
if find-rule($selector) >= 0 {
remove-rule($selector);
set-variable("selector", concat(".", $class, ":before"));
set-rule($selector, "float");
set-rule($selector, "width");
set-rule($selector, "content",
concat(get-rule($selector, "content"), ' " "'));
set-rule($selector, "display", "inline");
}
}
}
The above XED script:
Delete CSS rules like this one:
.n-1-0:after {
clear: both;
content: "";
display: block;
}
Modify CSS rules like this one:
.n-1-0:before {
content: counter(n-1-0);
counter-increment: n-1-0;
float: left;
width: 21.6pt;
}
which becomes:
.n-1-0:before {
content: counter(n-1-0) " ";
counter-increment: n-1-0;
display: inline;
}
This script is useful because otherwise adding a bottom border to headings gives an ugly result. While the contents of the heading is “underlined”, the CSS float containing the numbering value of the heading is not.
Besides get-class, the following XPath extension functions may be used to access the CSS styles contained in the XHTML+CSS document created by the Convert step: find-rule, font-size, get-rule, get-style, lookup-length, lookup-style, style-count.
Why use XPath extension function get-class and not matches(@class,pattern)?
The answer is: because all class attributes have been removed by XED script w2x_install_dir/xed/init-styles.xed.
This script “interns” the CSS rules found in the html/head/style element of the XHTML+CSS document, the CSS styles directly set on some elements and the CSS classes set on some elements.
This operation is needed to allow an efficient implementation of the following XPath extension functions: find-rule, font-size, get-class, get-rule, get-style, lookup-length, lookup-style, style-count, and of the following editing commands: add-class, add-rule, remove-class, remove-rule, set-rule, set-style.
More information about “interned” CSS styles in command parse-styles (command invoked by w2x_install_dir/xed/init-styles.xed) and inverse command unparsed-styles (command invoked by w2x_install_dir/xed/finish-styles.xed).
Customizing the semantic XML files generated by w2x
Converting custom character styles to semantic tags
Converting a custom character style to an XHTML element (possibly having specific attributes) is simple and does not require writing a XED script. Suffice for that to pass parameter inlines.convert to the Edit step.
Example 1: convert text spans having a “Code” character style to XHTML element code:
-p edit.inlines.convert "c-Code code"
Notice that the name of character style in the generated XHTML+CSS file is always prefixed by “c-“.
The syntax for the value of parameter inlines.convert is:
value → conversion [ S ‘!’ S conversion ]*
conversion → style_spec S XHTML_element_name [ S attribute ]*
style_spec → style_name | style_pattern
style_pattern → ‘/’ pattern ’/’ | ‘^’ pattern ‘$’
attribute → attribute_name ‘=’ quoted_attribute_value
quoted_attribute_value → “’” value “’” | ‘”’ value ‘”’
Example 2: in addition to what’s done in above example 1, convert text spans having a “Abbrev” character style to XHTML element abbr having a title=”???” attribute:
-p edit.inlines.convert "c-Code code ! c-Abbrev abbr title='???'"
What if the semantic XHTML created by the Edit step is then converted to DITA or DocBook by the means of a Transform step?
In the case of XHTML elements code and abbr, there is nothing else to do because the stock XSLT stylesheets already support these elements:
w2x_install_dir/xslt/topic.xslt converts XHTML code to DITA codeph and XHTML abbr to DITA keyword,
w2x_install_dir/xslt/docbook.xslt converts XHTML code to DocBook code and XHTML abbr to DocBook abbrev.
The general case which also requires using custom XSLT stylesheets is explained in section The general case.
Converting custom paragraph styles to semantic tags
Converting a custom paragraph style to an XHTML element (possibly having specific attributes) is simple and does not require writing a XED script. Suffice for that to pass parameter blocks.convert to the Edit step.
Example 1.a: convert paragraphs having a “ProgramListing” paragraph style to XHTML element pre:
-p edit.blocks.convert "p-ProgramListing pre"
Notice that the name of paragraph style in the generated XHTML+CSS file is always prefixed by “p-“.
If you use the above blocks.convert specification, it will work fine, except that you’ll end up with several consecutive pre elements (one pre per line of program listing). This is clearly not what you want. You want consecutive pre elements to be merged into a single pre element. Fortunately implementing this too is quite simple.
Example 1.b: convert paragraphs having a “ProgramListing” paragraph style to XHTML element span (having grouping attributes; more about this below):
-p edit.blocks.convert "p-ProgramListing span g:id='pre' g:container='pre'"
When any of the target XHTML elements have grouping attributes (g:id='pre'7, g:container='pre', in the above example), then w2x_install_dir/xed/blocks.xed automatically invokes the group() command at the end of the conversions. This has the effect of grouping consecutive <span g:id='pre' g:container='pre'> into a common pre parent element.
Given the fact that XED command group() automatically removes grouping attributes when done and that w2x_install_dir/xed/finish.xed discards all useless span elements, this leaves us with clean pre elements containing text8.
The syntax for the value of parameter blocks.convert is:
value → conversion [ S ‘!’ S conversion ]*
conversion → style_spec S XHTML_element_name [ S attribute ]*
style_spec → style_name | style_pattern
style_pattern → ‘/’ pattern ’/’ | ‘^’ pattern ‘$’
attribute → attribute_name ‘=’ quoted_attribute_value
quoted_attribute_value → “’” value “’” | ‘”’ value ‘”’
Example 3: in addition to what’s done in above example 1.b, convert paragraphs having a “Term” paragraph style to XHTML element dt, convert paragraphs having a “Definition” paragraph style to XHTML element dl and group consecutive dt and dl elements into a common dl parent:
-p edit.blocks.convert "p-Term dt g:id='dl' g:container='dl' !¬
p-Definition dd g:id='dl' g:container='dl' !¬
p-ProgramListing span g:id='pre' g:container='pre'"
What if the semantic XHTML created by the Edit step is then converted to DITA or DocBook by the means of a Transform step?
In the case of XHTML elements pre, dt, dd and dl, there is nothing else to do because the stock XSLT stylesheets already support these elements.
The general case which also requires using custom XSLT stylesheets is explained in section The general case.
The general case
In the general case, customizing the semantic XML files generated by w2x requires writing both a XED script and an XSLT stylesheet.
For example, let’s suppose we want to group all the paragraphs having a “Note” paragraph style and to generate for such groups DocBook and DITA note elements.
The following blocks.convert parameter would allow to very easily create the desired groups:
-p edit.blocks.convert "p-Note p g:id='note_group_member'¬
g:container='div class=\”role-note\” ’"
However this would leave us with two unsolved problems:
A paragraph having a “Note” paragraph style often starts with bold text “Note:”. We want to eliminate this redundant label.
The stock XSLT stylesheets will not convert XHTML element <div class=”role-note”> to a DocBook or DITA note element.
A custom XED script
The first problem is solved by the following w2x_install_dir/doc/manual/customize/notes.xed script:
namespace "http://www.w3.org/1999/xhtml";
namespace html = "http://www.w3.org/1999/xhtml";
namespace g = "urn:x-mlmind:namespace:group";
for-each /html/body//p[get-class("p-Note")] {
delete-text("note:\s*", "i");
if content-type() <= 1 and not(@id) {
delete();
} else {
remove-class("p-Note");
set-attribute("g:id", "note_group_member");
set-attribute("g:container", "div class='role-note'");
}
}
group();
The “Note:” label, if any, is deleted using XED command delete-text. If doing this creates a useless empty (content-type() <= 1) paragraph, then delete this paragraph using XED command delete.
The above script is executed after stock script w2x_install_dir/xed/blocks.xed by the means of the following w2x command-line option:
-pu edit.after.blocks customize\notes.xed
A custom XSLT stylesheet
The second problem is solved by the following w2x_install_dir/doc/manual/customize/custom_topic.xslt XSLT 1.0 stylesheet:
<xsl:stylesheet version="1.0"
xmlns:xsl="http://www.w3.org/1999/XSL/Transform"
xmlns:h="http://www.w3.org/1999/xhtml"
exclude-result-prefixes="h">
<xsl:import href="w2x:xslt/topic.xslt"/>
<xsl:template match="h:div[@class = 'role-note']">
<note>
<xsl:call-template name="processCommonAttributes"/>
<xsl:apply-templates/>
</note>
</xsl:template>
...
</xsl:stylesheet>
This stylesheet, which imports stock w2x_install_dir/xslt/topic.xslt, is used for the topic, map and bookmap output formats (see –o option). Similar, very simple, stylesheets have been developed for the docbook and docbook5 output formats.
Note: Something like “w2x:xslt/topic.xslt” is an absolute URL supported by w2x. “w2x:” is an URL prefix (defined in the automatic XML catalog used by w2x) which specifies the location of the parent directory of both the xed/ and xslt/ subdirectories.
The above stylesheet replaces the stock one by the means of the following w2x command-line option:
-o topic -t customize\custom_topic.xslt
Do not forget to specify the –t option after the –o option, because it’s the –o option which implicitly invokes stock w2x_install_dir/xslt/topic.xslt (this has been explained in chapter Going further with w2x) and we want to use –t to override the use of the stock XSLT stylesheet.
Tip: You’ll find a template for custom XED scripts and several templates for custom XSLT stylesheets in w2x_install_dir/doc/manual/templates/.
For example, in order to create w2x_install_dir/doc/manual/customize/custom_topic.xslt, we started by copying template XSLT stylesheet w2x_install_dir/doc/manual/templates/template_topic.xslt.
Generating XML conforming to a custom schema
In order to use w2x to convert a DOCX input file to an XML output file conforming to your custom schema, all you have to do is write a custom XSLT 1.0 stylesheet converting the “semantic” XHTML 1.0 Transitional generated by the Edit step to your custom schema.
Let’s call your custom XSLT 1.0 stylesheet “C:\Users\John\foo\xsl\xhtml_to_foo.xsl”. Command-line tool w2x must then be passed the following options:
-c
Execute a Convert step called “convert”.
-e XED_URL_or_file
Execute an Edit step called “edit”.
Example: -e w2x:xed/main.xed. Pass this stock XED script (converting the styled XHTML 1.0 Transitional created by the Convert step to “semantic” XHTML) to the conversion step called “edit”.
-t XSLT_URL_or_file
Execute a Transform step called “transform”.
Example: -t "C:\Users\John\foo\xsl\xhtml_to_foo.xsl".
Pass your custom XSLT 1.0 stylesheet to the conversion step called “transform”.
Stock XED script w2x:xed/main.xed creates a number of semantic XHTML elements having a class attribute starting with “role-“. Examples: <div class=”role-section1”>, <div class=”role-section2”>, <div class=”role-figure”>, <div class=”role-figcaption”>, <a class=”role-footnote-ref”>, <div class=”role-footnote”>, <a class=”role-xref”>, <span class=”role-index-term”>, etc. To learn how to process these elements, the simplest is to look how this is done in a stock XSLT stylesheet such as “w2x_install_dir/xslt/topic.xslt” or “w2x_install_dir/xslt/docbook.xslt”.
Packaging your customization as a w2x plugin
Command-line utility w2x and desktop application w2x-app support plugins.
Let’s suppose you have created a plugin called “rss” which may be used to convert DOCX to RSS. Once registered with w2x, this plugin may be invoked as it were a stock conversion, for example:
w2x -o rss my.docx my.xml
Other example, using a plugin called “wh5_zip” (see description below):
w2x -o wh5_zip -p zip.include-top-dir false my.docx my.zip
In w2x-app, you'll find the registered plugins in the "Convert to" combobox and in the "Output format" screen of the setup assistant.
Anatomy of a plugin
A plugin is simply a plain text file, using an UTF-8 character encoding, having a ".w2x_plugin" file suffix, containing a number of w2x command-line arguments and starting with comment lines containing information about the plugin (for example, its name). Example, w2x_install_dir/sample_plugins/rss/rss.w2x_plugin:
### plugin.name: rss
### plugin.outputDescription: RSS 2.0
### plugin.outputExtension: xml
### plugin.multiFileOutput: no
-c
-e w2x:xed/main.xed
-t rss.xslt
# Image files not useful here.
-step:com.xmlmind.w2x.processor.DeleteFilesStep:cleanUp
-p cleanUp.files "%{~pO}/%{~nO}_files"
Field Name | Default Value | Description |
plugin.name: | Basename of the ".w2x_plugin" file without its extension. | The name of the plugin (a single word). |
plugin.outputDescription: | The name of the plugin. | A short description (just a few words) of the output format of this plugin. |
plugin.outputExtension: | xml | Preferred extension for the files created by this plugin. |
plugin.multiFileOutput: | no | Whether this plugin creates multiple files or just a single one. A boolean: “true”, “yes”, “on”, “1” or “false”, “no”, “off”, “0”. |
The above rss plugin converts DOCX to RSS. This process is partly implemented by XSLT 1.0 stylesheet w2x_install_dir/sample_plugins/rss/rss.xslt which is part of this plugin. Stylesheet rss.xslt transforms its input, the semantic XHTML 1.0 Transitional file created by the Edit step (invoked using -e w2x:xed/main.xed), to RSS.
Aside XSLT 1.0 stylesheets, a plugin may also include XED scripts as well as ".jar" files containing support code and/or custom conversion steps implemented in Java™. Example, w2x_install_dir/sample_plugins/wh5_zip/wh5_zip.w2x_plugin:
### plugin.outputDescription: Web Help ZIP containing "semantic" (X)HTML 5.0
### plugin.outputExtension: zip
-o webhelp5
-p webhelp.split-before-level 8
-p webhelp.use-id-as-filename yes
-p webhelp.omit-toc-root yes
-p webhelp.wh-layout simple
# Generate all HTML files in a subdirectory of the output directory
# having the same basename as the ".zip" output file.
-p convert.xhtml-file "%{~pO}/%{~nO}/%{~nO}.xhtml"
-p transform.out-file "%{~pO}/%{~nO}/%{~nO}_tmp.xhtml"
-p webhelp.out-file "%{~pO}/%{~nO}/%{~nO}.html"
-p cleanUp.files "%{~pO}/%{~nO}/%{~nO}_tmp.xhtml"
-step:ZipStep:zip
-p zip.out-file "%{O}"
The above wh5_zip plugin specializes the stock conversion called webhelp5 (Web Help containing XHTML 5.0) by giving specific values to some of its parameters (e.g. -p webhelp.wh-layout simple) and also by archiving all the output files in a single “.zip” file.
This last step, -step:ZipStep:zip, is implemented by a custom conversion step found in w2x_install_dir/sample_plugins/wh5_zip/src/ZipStep.java. This Java™ code is compiled and archived in w2x_install_dir/sample_plugins/wh5_zip/zip_step.jar by the means of ant build file w2x_install_dir/sample_plugins/wh5_zip/src/build.xml.
Note that these ".jar" files, just like the ".w2x_plugin" files, are automatically discovered and loaded by w2x and w2x-app during their startup phase.
Registering a plugin with w2x
A plugin is registered with both w2x and w2x-app by copying all its files anywhere inside directory w2x_install_dir/plugin/.
However it's strongly recommended to group all the files comprising a plugin in a subdirectory of its own having the same name as the plug-in (e.g. w2x_install_dir/plugin/rss/).
If the .dmg distribution has been used to install XMLmind Word To XML on the Mac, the plugin directory is WordToXML.app/Contents/Resources/w2x/plugin/.
Alternatively, this plugin may be installed anywhere you want provided that the directory containing the ".w2x_plugin" file is referenced in the W2X_PLUGIN_PATH environment variable. Example: set W2X_PLUGIN_PATH=C:\Users\John\w2x\rss;C:\temp\w2x_plugins.
The W2X_PLUGIN_PATH environment variable (or, equivalently, the W2X_PLUGIN_PATH Java™ system property; e.g. -DW2X_PLUGIN_PATH=C:\Users\John\w2x\rss;C:\temp\w2x_plugins) may contain absolute or relative directory paths separated by semi-colons (";"). A relative path is relative to the current working directory.
The W2X_PLUGIN_PATH environment variable may also contain "+", which is a shorthand for w2x_install_dir/plugin/. Windows example: set W2X_PLUGIN_PATH=..\sample_plugins;+. Linux/macOS example: export W2X_PLUGIN_PATH=+;/home/john/w2x_plugins.
The w2x command-line utility
If the .dmg distribution has been used to install XMLmind Word To XML on the Mac, the w2x command-line utility is found in WordToXML.app/Contents/Resources/w2x/bin/.
Usage:
w2x [-version] [-v|-vv|-vvv] [Options]
in_docx_file out_file
| -batch out_spec in_docx_file1 ... in_docx_fileN
| -printenv
| -liststeps
-v
-vv
-vvv
Verbose. More Vs means more verbose.
-version
Print version number and exit.
-batch out_spec in_docx_file1 … in_docx_fileN
Convert all specified input DOCX files. out_spec specifies the absolute or relative path of the output files. It may contain the following variables: @{name}, basename of the input file without any extension, @{parent}, absolute path of the directory containing the input file. Example:
C:\Users\jane> w2x -o docbook5 -batch pub\@{name}.xml Documents\*.docx
Same example but this time, convert all DOCX files in place:
C:\Users\jane> w2x -o docbook5 -batch @{parent}\@{name}.xml Documents\*.docx
-printenv
Print supported environment variables/system properties and exit. Example:
C:\> w2x -printenv
W2X_TRACE=
(Supported values are: "image", "math" or "all".)
W2X_IMAGE_CONVERSIONS=
.emf.svg.wmf.svg java:com.xmlmind.w2x_ext.wmf_converter.WMFConverterFactory;
.emf.png.wmf.png java:com.xmlmind.w2x_ext.emf2png.EMF2PNG;
.bmp.jpg.bmp.jpeg.bmp.png.gif.jpg.gif.jpeg.gif.png
.jpeg.png.jpg.png.png.jpg.png.jpeg.tif.jpg.tif.jpeg
.tif.png.tiff.jpg.tiff.jpeg.tiff.png.wbmp.jpg.wbmp.jpeg
.wbmp.png java:com.xmlmind.w2x.docx.image.ImageConverterFactoryImpl
-liststeps
List the conversion steps to be executed and exit. This option is useful to determine how to customize the conversion steps. Example:
$ w2x -o bookmap -liststeps
-step:com.xmlmind.w2x.processor.ConvertStep:convert
-p convert.create-mathml-object no
-p convert.set-column-number yes
-step:com.xmlmind.w2x.processor.EditStep:edit
-p edit.xed-url-or-file file:/opt/w2x/xed/main.xed
-step:com.xmlmind.w2x.processor.TransformStep:transform
-p transform.out-file %{~pnO}.dita
-p transform.single-topic no
-p transform.xslt-url-or-file file:/opt/w2x/xslt/topic.xslt
-step:com.xmlmind.w2x.processor.TransformStep:transform2
-p transform2.xslt-url-or-file file:/opt/w2x/xslt/bookmap.xslt
-p transform2.topic-type %{transform.topic-type}
-p transform2.output-path %{~po}
-step:com.xmlmind.w2x.processor.DeleteFilesStep:cleanUp
-p cleanUp.files %{~pnO}.dita
The -liststeps option is also useful when developing a plugin. It may be used to learn how a stock conversion (e.g. bookmap) is implemented to get some inspiration when developing your own plugin.
Other options are:
-o format
This option automatically adds all the steps needed to convert input DOCX file to an output file having specified format.
Possible formats: docbook, docbook5, assembly (DocBook V5.1 assembly), topic, map, bookmap, xhtml_css (single-page styled HTML, that is, single-page XHTML+CSS), xhtml_strict, xhtml_loose, xhtml1_1, xhtml5, frameset (multi-page styled HTML), frameset_strict (multi-page XHTML 1.0 Strict), frameset_loose (multi-page XHTML 1.0 Transitional), frameset1_1 (multi-page XHTML 1.1), frameset5 (multi-page XHTML 5.0), webhelp (Web Help containing styled HTML), webhelp_strict (Web Help containing XHTML 1.0 Strict), webhelp_loose (Web Help containing XHTML 1.0 Transitional), webhelp1_1 (Web Help containing XHTML 1.1), webhelp5 (Web Help containing XHTML 5.0), epub (EPUB 2 containing styled XHTML 1.1), epub1_1 (EPUB 2 containing semantic XHTML 1.1).
The default output format is: xhtml_css (single-page styled HTML, that is, single-page XHTML+CSS).
-p name value
Set parameter name to value.
Use parameter step_name.param_name to parametrize the step called step_name.
Because they are used to parameterize named steps, the order of –p and –pu options relatively to options specifying conversions steps (-c, -e, -t, -step, etc) is not significant. For example: “-p convert.charset UTF-8 -c” is equivalent to “-c -p convert.charset UTF-8”.
-pu name URL_or_file
Same as -p, except that parameter value URL_or_file is first converted to an URL.
URL_or_file is an absolute or relative URL (relative to current -f options file if any, to current working directory otherwise) or the filename of an existing file or directory.
-c
Add or replace “convert” step. This step converts input DOCX file to an in-memory XHTML +CSS document.
-l
Add or replace “load” step. This step, mainly used to test XED scripts, loads input XML file.
-e xed_URL_or_file
Add or replace “edit” step. This step edits in place input XHTML document using XED script xed_URL_or_file.
-e2 xed_URL_or_file
Add or replace “edit2” step. This step edits in place input XHTML document using XED script xed_URL_or_file.
-t xslt_URL_or_file
Add or replace “transform” step. This step transforms input XML document or file using XSLT stylesheet xslt_URL_or_file.
The output file is specified by parameter transform.out-file.
-t2 xslt_URL_or_file
Add or replace “transform2” step. This step transforms input XML document or file using XSLT stylesheet xslt_URL_or_file.
The output file is specified by parameter transform2.out-file.
-s
Add or replace “save” step. This step saves to disk input XHTML document.
The output file is specified by parameter save.out-file.
-step:java_class_name:step_name
Add or replace step called step_name by an instance of Java™ class java_class_name deriving from com.xmlmind.w2x.processor.ProcessStep.
-f options_URL_or_file
Load one or more of the above options from options_URL_or_file, a plain UTF-8 text file
Variables substituted in the parameter values passed to the –p and –pu options
The following variables are substituted in the parameter values passed to the –p and –pu options.
Variable | Description | Example |
%{I} | Full path of the input DOCX file. | C:\My Docs\report.docx |
%{O} | Full path of the output XML file. | C:\My Docs\out\report.xml |
%{i} | Absolute URL of the input DOCX file. | file:/C:/My%20Docs/report.docx |
%{o} | Absolute URL of the output XML file. | file:/C:/My%20Docs/out/report.xml |
Variables %{I}, %{O}, %{i} and %{o} may all contain one or more of following modifiers. First modifier must be preceded by character “~”.
Modifier | Description |
n | The name of the file or URL without any extension. |
x | The extension of the file or URL. Starts with “.”. |
p | The full path of the parent directory of the file or URL. |
Note that combinations of modifiers other than “~nx”, “~pn”, “~pnx” do not make sense and that, for example, %{~pnxI} is equivalent to %{I}.
Examples: let’s suppose that command-line argument in_docx_file (see above) is “C:\My Docs\report.docx” and that argument out_file is “C:\My Docs\out\report.xml”.
%{~nI} is replaced by “report”.
%{~xI} is replaced by “.docx”.
%{~pI} is replaced by “C:\My Docs”.
%{~nxo} is replaced by “report.xml”.
%{~pno} is replaced by “file:/C:/My%20Docs/out/report”.
Other variables substituted in the parameter values passed to the –p and –pu options:
The value of another parameter passed to w2x by the means of the –p or –pu options. Example: when “w2x -o map -p transform.topic-type concept ...” is executed, %{transform.topic-type} is substituted with "concept".
Any Java™ system property. Example: %{file.separator} is substituted with "\" on Windows and with "/" on the other platforms.
When a variable is not defined, its value is "", the empty string. Example: %{foo} is substituted with "".
Default conversion steps
If none of the options creating a step (-l, -c, -e, -e2, -t, -t2, -s, -step) have been specified, w2x automatically adds the equivalent of –o xhtml_css, which consists in the following conversion steps:
-c
-e
-p edit.xed-url-or-file w2x:xed/main-styled.xed
-s
The above options convert the input DOCX file to clean, styled, valid XHTML. The resulting output file is not indented.
Note: Something like “w2x:xed/main-styled.xed” is an absolute URL supported by w2x. “w2x:” is an URL prefix (defined in the automatic XML catalog used by w2x) which specifies the location of the parent directory of both the xed/ and xslt/ subdirectories.
Automatic conversion step parameters
If the first conversion step is a Convert step, the following parameters are automatically added by w2x (unless, of course, they have already been specified by the user):
If out_file extension starts with “htm” or “shtm”,
-p step_name.charset UTF-8
The charset parameter allows to get Web browsers consider the generated document as being HTML, and not XHTML.
-pu step_name.xhtml-file out_file_with_an_xhtml_extension
If the last conversion step is a Save step, Transform step, Split step, Web Help step or EPUB step the following parameters are automatically added by w2x (unless, of course, they have already been specified by the user):
-pu step_name.out-file out_file
Conversion step reference
Convert step
Convert input DOCX file to a styled, valid, XHTML 1.0 Transitional document. The result of this step is this XHTML document.
For clarity, the “convert.” parameter name prefix is omitted here.
However when you’ll pass any of the following parameters to w2x, please do not forget this prefix. Example: -p convert.resource-directory images.
Parameters:
Name | Value | Description |
automatic-ids | A regular expression pattern. Default: | Specifies the names of the bookmarks which are automatically generated by MS-Word. This parameter is used to favor user-specified bookmarks, which are expected to have long and descriptive names, over those automatically generated by MS-Word ("_GoBack", "_Toc123", "BM3",etc). If specified regular expression pattern starts with "|", it is appended to the default one. If specified regular expression pattern ends with "|", it is prepended to the default one. |
charset | A valid character encoding (e.g. UTF-8, Windows-1252). Default: no charset, add an XML declaration. | When a charset is specified, a meta element is added to the head element of the generated document: <meta charset=”charset”/> if parameter version is “5.0”, <meta content=”text/html; charset=charset” http-equiv=”Content-Type” /> otherwise. If the specified charset is “UTF-8”, then the XML declaration (<?xml version=”1.0” encoding=”UTF-8”?>) is not to added to the generated document. This allows to get Web browsers consider the generated document as being HTML, and not XHTML. |
converted-image-extensions | A list of image file extensions separated by space characters. Default: “svg png jpeg”. | When the input DOCX file contains an image not having any of the file extensions specified in the converted-image-extensions list, attempt to convert this image to one of the formats of this list. Each format is considered in turn, that’s why w2x will attempt to convert a WMF/EMF image to SVG first, before considering PNG and JPEG. |
create-mathml-object | “yes” | “no” | “auto” Default: “auto”. | When converting MS-Word math (that is, OpenXML math) to MathML: yes Generate an external file containing the converted MathML element and insert an object element pointing to the generated “.mml” file. Example: <object data="doc_files/math-010.mml" type="application/mathml+xml"/>. no Embed the converted MathML element in the XHTML document created by this step. auto Embed the converted MathML element in the XHTML document but only if parameter version is set to 5.09. |
default-lang | A valid language code (e.g. en, fr-CA). No default. | if parameter set-lang is not specified and if the main language of the document cannot determined by examining the contents of the input DOCX file, set the lang attribute of the html element to this value. About East Asian languages Due to a limitation, it is recommended to specify for example –p convert.set-lang ja-JP or –p convert.default-lang ja-JP when converting a document written mainly in Japanese. When parameter convert.set-lang or parameter convert.default-lang is set to a language code starting with ja, zh or ko, then it is attribute w:lang/@w:eastAsia which is used to determine the language of a text span and not attribute w:lang/@w:val. Note that –p convert.default-lang ja-JP is just used as a hint to favor attribute w:lang/@w:eastAsia over attribute wlang/@w:val. Given the way MS-Word sets these two attributes, using parameter –p convert.default-lang ja-JP will not cause a vastly incorrect detection of the language when converting a German DOCX file for example. |
lower-case-resource-names | A boolean: true (same as: yes | on | 1) | false (same as: no | off | 0). Default: false. | Not for general use. Specifying this parameter as true is needed to keep quiet epubcheck on platforms where filenames are case-sensitive (e.g. Linux). |
resource-directory | A file path. Default: if parameter xhtml-file is specified, basename of xhtml-file, without an extension, but followed by “_files”; otherwise the absolute path of an automatically created temporary directory. | Specifies the file path of the directory which is to contain copies of the images referenced in the input DOCX file. A relative file path is relative to the value of parameter xhtml-file. Note that, if it already exists, a resource directory specified this way is not automatically made empty by w2x before being used to store resources. Only the “automatic”, default, output_file_basename_files/ folder is automatically made empty by w2x (if this “automatic” folder already exists). |
resource-prefix | A non-empty string not containing the file separator character (“/” or “\”). Default: none, no prefix. | Specifies a prefix to be prepended to the names of resource files created by w2x. This prefix is useful when used in conjunction with parameter resource-directory and when several files generated by w2x share the same resource directory. |
set-column-number | A boolean: true (same as: yes | on | 1) | false (same as: no | off | 0). Default: false. | If specified as true, insert in each table cell a column-number processing-instruction containing the column number of this cell. First column is column #1. Example: <?column-number 1?> This processing-instruction greatly helps in generating CALS tables (DocBook, DITA) containing cells spanning several columns. |
set-lang | A valid language code (e.g. en, fr-CA). No default: set the lang attribute of the html element after examining the contents of the input DOCX file. | if specified, set the lang attribute of the html element to this value. About East Asian languages Due to a limitation, it is recommended to specify for example –p convert.set-lang ja-JP or –p convert.default-lang ja-JP when converting a document written mainly in Japanese. When parameter convert.set-lang or parameter convert.default-lang is set to a language code starting with ja, zh or ko, then it is attribute w:lang/@w:eastAsia which is used to determine the language of a text span and not attribute w:lang/@w:val. |
version | 1.0_transitional (same as: 1.0_loose | 1) | 1.0_strict | 1.1 | 5.0 (same as: 5) | “”. Default: 1.0_transitional. | Specifies which XHTML version to generate, hence which <!DOCTYPE> to add to generated XHTML document. Note that XHTML 5.0 has no DTD, hence no <!DOCTYPE> for this version. The empty string “” means: generate XHTML 1.0 Transitional , but do not add a <!DOCTYPE>. |
xhtml-file | A file path. No default . | If the generated XHTML document was saved to disk, this would be the path of its save file. When specified (which is strongly recommended), this file path is used to give a base URL to the generated XHTML document. |
Delete files step
Delete files or directories having specified path or matching specified glob pattern. The input of this step is ignored. The result of this step is thus equal to its input.
This step is used for example when generating a DITA map or bookmap. It is used to delete the intermediate topic file created by the first Transform step.
Parameters (for clarity, the “cleanUp.” parameter name prefix is omitted here):
Name | Value | Description |
files | A file path or glob pattern. No default (required). | Specifies which files or directories are to be deleted. A relative file path or glob pattern is relative to the current working directory. |
Edit step
Edit in place input XHTML document using a XED script. The result of this step is the same XHTML document, but modified by the script.
For clarity, the “edit.” parameter name prefix is omitted here.
However when you’ll pass any of the following parameters to w2x, please do not forget this prefix. Example: -p edit.ids.generate-section-ids yes.
Parameters:
Name | Value | Description |
xed-url-or-file | An absolute URL or the path of an existing file. No default (required). | Specifies which XED script should be used to edit the input XHTML document. A relative file path is relative to the current working directory. |
Any other parameter is passed to the XED script as a XED global variable.
XMLmind Word to XML (w2x for short) comes with two stock “main” XED scripts:
w2x:xed/main-styled.xed
Invokes XED scripts used to “polish up” the styled XHTML 1.0 Transitional document created by the Convert step (e.g. process consecutive paragraphs having identical borders).
w2x:xed/main.xed
Invokes XED scripts used to prepare the generation of semantic XML of all kinds: XHTML, DocBook, DITA. These scripts leverage the CSS styles and classes found in the styled XHTML 1.0 Transitional document created by the Convert step. They translate these CSS styles and classes (e.g. numbered paragraph) into semantic tags (e.g. ol/li).
Note: Something like “w2x:xed/main.xed” is an absolute URL supported by w2x. “w2x:” is an URL prefix (defined in the automatic XML catalog used by w2x) which specifies the location of the parent directory of both the xed/ and xslt/ subdirectories.
Table 1 Parameters common to w2x:xed/main-styled.xed and w2x:xed/main.xed
Name | Value | Description |
finish-styles.css-uri | An absolute or relative “file:” URI. Default: “”. “Interned” CSS styles, if any, are stored in a head/style element. | Global variable defined in w2x:xed/finish-styles.xed. Store “interned” CSS styles, if any, in the CSS (UTF-8 encoded) file having this URI. A relative URI is relative to the URI specified by parameter xhtml-file. More information about “interned” CSS styles in command parse-styles (command invoked by w2x:xed/init-styles.xed) and inverse command unparsed-styles (command invoked by w2x:xed/finish-styles.xed). |
finish-styles. custom-styles-url-or-file | An absolute URL or a filename. A relative filename is relative to the current working directory. Default: “” (no custom styles). | Global variable defined in w2x:xed/finish-styles.xed. Specifies the location of a CSS file. The custom CSS styles found in specified file are simply appended to the automatically generated CSS styles. Using this variable is the easiest way to customize the automatically generated CSS styles. When generating multi-page styled or semantic XHTML of any kind (frameset, Web Help, EPUB) Please use finish-styles. custom-styles-url-or-file to specify custom CSS styles. No need to specify finish-styles.css-uri as all the CSS styles are anyway stored into an external “.css” file having the same basename as the main output file. |
finish-styles.mathjax | “yes” | “no” | “auto” Default: “no”. | Global variable defined in w2x:xed/finish-styles.xed. Very few web browsers (Firefox) can natively render MathML. Fortunately, there is MathJax. MathJax is a JavaScript display engine for mathematics that works in all browsers. yes Add a <script> element loading MathJax to the <html>/<head> element of the generated XHTML file. auto Same as “yes”, but add <script> only when the generated XHTML file contains MathML. |
finish-styles.mathjax-url | String. Default value: the URL pointing to the MathJax CDN, as recommended in the MathJax documentation. | Global variable defined in w2x:xed/finish-styles.xed. The URL allowing to load the MathJax engine configured for rendering MathML. Ignored unless parameter mathjax is set to “yes” or “auto”. |
title.keep-title | “yes” | “no” Default: “yes” when generating styled or semantic XHTML of all kinds (single-page, EPUB, etc), “no” when generating any other format. | Global variable defined in w2x:xed/title.xed. Default value “no” specifies that paragraphs having “p-Title” and “p-Subtitle” styles (to make it simple; see also parameters title.title-style-names and title.subtitle-style-names) are to be converted only to head/title and to head/meta name="description". This simple behavior makes these titles invisible to the user, though usable by programs such as the XSLT stylesheets generating DITA or DocBook. Value “yes” may be used to specify that paragraphs having “p-Title” and “p-Subtitle” styles are additionally converted to equivalent, visible, XHTML elements. These equivalent, visible, XHTML elements are specified by parameters title.title-container and title.subtitle-container. |
title.title-container | An XHTML element name possibly followed by one or more attributes. Default: “” when generating styled XHTML; otherwise “h1 class='role-document-title'” . | Global variable defined in w2x:xed/title.xed. Specifies the XHTML element to which a paragraph having a “p-Title” style is to be converted. An empty string value is equivalent to “p”. Ignored when parameter title.keep-title is “no”. |
title.title-style-names | List of user-defined style names separated by space characters. Default: “” (empty list). | Global variable defined in w2x:xed/title.xed. Specifies which user-defined paragraph styles should be considered to be equivalent to standard style “p-Title”. (Paragraph styles, whether user-defined or standard, are given a “p-“ prefix by the Convert step.) |
title.subtitle-container | An XHTML element name possibly followed by one or more attributes. Default: “” when generating styled XHTML; otherwise “p class='role-document-subtitle'”. | Global variable defined in w2x:xed/title.xed. Specifies the XHTML element to which a paragraph having a “p-Subtitle” style is to be converted. An empty string value is equivalent to “p”. Ignored when parameter title.keep-title is “no”. |
title.subtitle-style-names | List of user-defined style names separated by space characters. Default: “” (empty list). | Global variable defined in w2x:xed/title.xed. Specifies which user-defined paragraph styles should be considered to be equivalent to standard style “p-Subtitle”. (Paragraph styles, whether user-defined or standard, are given a “p-“ prefix by the Convert step.) |
Table 2 Parameters which are specific to w2x:xed/main-styled.xed
Name | Value | Description |
remove-pis.except | One or more processing-instructions targets separated by space characters. Default: “” (remove all processing-instructions) | Global variable defined in w2x:xed/remove-pis.xed. Specifies which processing-instructions should be kept in the styled HTML document. By default, all processing-instructions are removed from the styled HTML document. Such processing-instructions are useful only when the styled HTML document created by the Convert step is used as an intermediate format in order to generate semantic XML. |
Table 3 Parameters which are specific to w2x:xed/main.xed
Name | Value | Description |
before-save.allow-flow | “yes” | “no”. Default: “no”. | Global variable defined in w2x:xed/before-save.xed. If “yes”, allow flow elements (e.g. li) to directly contain text and inline elements. If “no”, do not allow flow elements (e.g. li) to directly contain text and inline elements. Instead “wrap” these text and and inline elements in <p class=”role-inline-wrapper”> elements. The “no” option greatly eases the generation of certain types of semantic XML (e.g. DocBook) during the Transform step. |
biblio.style-names | List of user-defined style names separated by space characters. Default: “” (empty list). | Global variable defined in w2x:xed/biblio.xed. Specifies which user-defined paragraph styles should be considered to be equivalent to standard style “p-Bibliography”. (Paragraph styles, whether user-defined or standard, are given a “p-“ prefix by the Convert step.) |
blocks.convert | A conversion specification. Default: “”. No conversions other than those performed by w2x:xed/blocks.xed. | Global variable defined in w2x:xed/blocks.xed. Specified paragraph styles are converted to specified XHTML elements. See below. |
blocks.convert-to-pre | A conversion specification. Default: “”. | Global variable defined in w2x:xed/blocks.xed. Specified paragraph styles are converted to specified XHTML elements. See below. When using MS-Word, there two ways to represent code samples: Use a sequence of paragraphs having the same style. Each paragraph contains one line of the code sample. Let’s call the style of these paragraphs Code1. Use a single paragraph containing the whole code sample, which means that this single paragraph contains significant whitespace and line breaks. Let’s call the style of this paragraph Code2. A sequence of Code1 paragraphs may be converted to an XHTML pre using: –p edit.blocks.convert "p-Code1 span g:id='pre' g:container='pre'" A Code2 paragraph may be converted to an XHTML pre using: –p edit.blocks.convert-to-pre "p-Code2 pre" |
captions.style-names | List of user-defined style names separated by space characters. Default: “” (empty list). | Global variable defined in w2x:xed/captions.xed. Specifies which user-defined paragraph styles should be considered to be equivalent to standard style “p-Caption”. (Paragraph styles, whether user-defined or standard, are given a “p-“ prefix by the Convert step.) |
convert-tabs.to-table | “yes” | “no”. Default: “no”. | Global variable defined in w2x:xed/convert-tabs.xed. If set to “yes”, convert consecutive paragraphs containing text runs aligned on tab stops to a borderless table. This option is turned off by default because, in the general case, it's not possible to emulate tab stops using tables. |
convert-tabs.unwrap-paragraphs | “yes” | “no”. Default: “yes”. | Global variable defined in w2x:xed/convert-tabs.xed. If set to “yes”, the cells contained in the borderless table used to emulate tab stops directly contain text runs rather than paragraphs. |
headings.convert | A conversion specification. Default: “”. No conversions other than those performed by w2x:xed/headings.xed. | Global variable defined in w2x:xed/headings.xed. Specified paragraph styles are converted to specified XHTML heading elements (h1, h2, …, h6). See below. Note that by default, script headings.xed automatically converts paragraphs having an outline level to h1, h2, …, h6 headings. |
ids.generate-section-ids | “yes” | “no”. Default: “no”. | Global variable defined in w2x:xed/ids.xed. Ensure that all the sections found in the semantic XHTML resulting from the conversion of a DOCX file have a unique ID. When this ID is missing, it is computed using the content of the h1, h2, ..., h6 heading which is the first child of the section. Example: <div class="role-section2" id="Title_of_this_section"> <h2>Title of this section</h2> ... Setting ids.generate-section-ids to yes is especially useful when converting a DOCX file to a DITA map or bookmap. With this parameter, the filenames of the topics referenced by the generated map are guaranteed to have meaningful values (e.g. "Introduction.dita" rather than "d0e35.dita"). |
ids.section-id-max-length | An integer greater or equal to 1. Default: 32. | Global variable defined in w2x:xed/ids.xed. Specifies the maximum length of the automatically computed ID when parameter ids.generate-section-ids is set to yes. |
index.index-term-separator | A string. Default: ", ". | Global variable defined in w2x:xed/index.xed. Specifies the string used to join index terms when a redirection to another index entry is to be generated (example: “See Cat, Siamese, Seal point”). |
inlines.b-element, | An element name optionally followed by attributes. Defaults: "b", "big", "i", "s", "small", "sub", "sup", "tt", "u". | Global variables defined in w2x:xed/inlines.xed. By default, the Edit step converts a text span having style="font-weight:bold" (as generated by the Convert step) to XHTML element b. Specifying parameter –p edit.inlines.b-element "strong" replaces default b element by a strong element. Similarly, alternate element names may be specified using the following parameters: inlines.sup-element, inlines.sup-element, inlines.small-element, inlines.big-element, inlines.s-element, inlines.u-element, inlines.tt-element, inlines.i-element. Example 1: generate code rather than tt elements: -p edit.inlines.tt-element "code". Example 2: do not generate small elements: -p edit.inlines.small-element "span style='font-size:x-small'" (notice how one or more attributes may be specified too). This facility is useful only when generating semantic XHTML and all formats based on semantic XHTML. Using it when generating DITA or DocBook may give poor results. |
inlines.convert | A conversion specification. Default: “”. No conversions other than those performed by w2x:xed/inlines.xed. | Global variable defined in w2x:xed/inlines.xed. Specified character styles are converted to specified XHTML elements . See below. |
inlines.generate-big-small | “yes” | “no”. Default: “yes”. | Global variable defined in w2x:xed/inlines.xed. Specifies whether spans having a bigger (respectively smaller) font size than their parent elements should be converted to big (respectively small) elements. |
lists.alternate-ordered-list-grouping | “yes” | “no”. Default: “no”. | Global variable defined in w2x:xed/lists.xed. Set this parameter to "yes" if, using MS-Word, you often create on purpose consecutive “ordered lists” having the same numbering specification (e.g. the list items all start with "a)", "b)", "c)", etc, but some consecutive list items have different numbering IDs). This will cause w2x to create one semantic XML ordered list per MS-Word list, which is almost certainly what you'll want to get. The default value of this parameter is "no" because MS-Word users generally create consecutive ordered lists having the same numbering specification by mistake. This default value causes w2x to create a single semantic XML ordered list for all consecutive MS-Word lists. |
metas.keep | Regular expression matching part or all of the name of the XHTML meta. | Global variable defined in w2x:xed/metas.xed. When generating semantic XML of any kind, all the XHTML meta elements but author, description, dcterms.* are automatically suppressed from the semantic XHTML 1.0 Transitional document generated by the Edit step and used as an input by the Transform step. If you want to keep some or all the meta elements in this intermediate semantic XHTML 1.0 Transitional document, you may specify Examples: -p edit metas.keep ".*" keeps all metas; -p edit metas.keep "^dc\." keep all metas having a name starting with "dc." (e.g. <meta name="dc.subject" content="..."/>). |
prune.preserve | List of user-defined style names separated by space characters. Default: “” (empty list). | Global variable defined in w2x:xed/prune.xed. Empty paragraphs having a user-defined style found in this list will not be deleted by w2x:xed/prune.xed. |
remove-styles.preserved-classes | List of user-defined style names separated by space characters. Default: “” (empty list). | Global variable defined in w2x:xed/remove-styles.xed. The CSS classes used to apply the user-defined styles specified in this list will not be removed by w2x:xed/removes-styles.xed. Note that specifying both parameters prune.preserve and remove-styles.preserved-classes is currently the only way to keep in the generated semantic XHTML empty paragraphs having a given MS-Word style. For example, specifying -p prune.preserve p-PlaceHolder and -p remove-styles.preserved-classes p-PlaceHolder may be used to keep in the semantic XHTML output all empty paragraphs having the p-PlaceHolder style. |
sections.max-level | An integer greater or equal to 1. Default: -1. No maximum level. | Global variable defined in w2x:xed/sections.xed. Wrap sequences of elements starting with a hN element (that is, h1, h2, h3, h4, h5, h6) into <div class=”role-sectionN> elements. This parameter specifies the maximum level of nesting for such sections. |
Simple conversion specifications
Above parameter blocks.convert (respectively inlines.convert) provides the user of w2x with a simple mean to convert p (respectively span) elements having certain paragraph (respectively character) styles to XHTML elements possibly having attributes.
The syntax of a simple conversion specification is:
spec → simple_spec [ S ‘!’ S simple_spec ]*
simple_spec → style_spec S XHTML_element_qname [ S attribute_spec ]*
style_spec → style_name | style_pattern
style_pattern → ‘/’ pattern ’/’ | ‘^’ pattern ‘$’
attribute_spec → attribute_qname ‘=’ quoted_attribute_value
quoted_attribute_value → “’” value “’” | ‘”’ value ‘”’
Note that when specifying a XHTML_element_qname, you must restrict yourself to XHTML 1.0 Transitional elements. Specifying for example, XHTML 5.0 elements such as mark, aside, section, etc, will not give you the results you’ll expect.
Examples: stock styled span conversions used by w2x:xed/inlines.xed:
/Emphasis$/ em !
c-Strong strong !
c-BookTitle cite !
/((IntenseReference)|(SubtleReference)|(QuoteChar))$/ em !
/((itleChar)|(Heading\d+Char))$/ strong
Custom styled span conversions used to process this manual:
c-Code code
Stock styled paragraph conversions used by w2x:xed/blocks.xed:
/Quote$/ p g:id='blockquote' g:container='blockquote'
Custom styled paragraph conversions used to process this manual:
p-Term dt g:id="dl" g:container="dl" !
p-Definition dd g:id="dl" g:container="dl" !
p-ProgramListing span g:id="pre" g:container="pre"
Automatic grouping of the XHTML elements which are the results of the styled paragraph conversions
In the above examples, attributes having names prefixed with “g:” are in the “urn:x-mlmind:namespace:group” namespace. These attributes are called grouping attributes. Examples: g:id, g:container.
When parameter blocks.convert is used to create XHTML elements having grouping attributes, command group() is automatically invoked at the end of all the styled paragraph conversions. To make it simple, this command groups consecutive XHTML elements having the same g:id attribute into a common parent element. The parent element is specified by attribute g:container.
In the above examples,
Consecutive p elements having grouping attributes g:id='blockquote' and g:container='blockquote' are grouped into a common blockquote parent element.
Consecutive dt and dt elements having grouping attributes g:id="dl" and g:container="dl are grouped into a common dl parent element.
Consecutive span elements having grouping attributes g:id="pre" and g:container="pre" are grouped into a common pre parent element.
EPUB step
Splits input XHTML document, whether styled or semantic, into several pages and packages these pages as an EPUB 2 book. The result of the this step is the file containing the EPUB book.
No tab expansion for EPUB 2
By default, when generating styled HTML (that is, XHTML+CSS), some JavaScript™ code (w2x_install_dir/xed/expand-tabs.js) is added to the output file. This code computes and gives a width to all <span class=”role-tab> </span>. This allows to decently emulate tab stops in any modern Web browser. More information in About tab stops.
However, this cannot work in the case of the EPUB 2 output format because scripting is disabled in the styled HTML pages comprising an EPUB book.
Same parameters as the Split step, plus the following EPUB specific parameters (for clarity, the “epub.” parameter name prefix is omitted here):
Name | Value | Description |
cover-image-url-or-file | An absolute URL or a filename. A relative filename is relative to the current working directory. Default: none (no cover page). | Specifies an image file which is to be used as the cover page of the EPUB book. This image must be a PNG or JPEG image. Its size must not exceed 1000x1000 pixels. |
default-lang | A language code conforming RFC 3066. Examples: de, fr-CA. Default value: en. | Main language of the EPUB book. This parameter is used only when this language cannot be determined by examining the input styled XHTML document. |
identifier | String. Default: dynamically generated UUID URN. | A globally unique identifier for the generated EPUB book (typically the permanent URL of the EPUB book). |
omit-toc-root | “yes” | “no” Default: “no”. | By default, the TOC generated for an EPUB document has a single “root”. This single root always points to the page containing the title, subtitle, author, etc, of the document. Setting this parameter to “yes” prevents the generated TOC from having such single root. |
out-file | A file path. No default (required). | Specifies the path of the EPUB book. A relative file path is relative to the current working directory. |
Load step
Loads an input XML file. The result of this step is loaded XML document.
This step is mainly useful to test XED scripts. Example:
w2x –l –e my_script.xed –s in.xhtml out.xhtml
Note that if loaded file starts with a <!DOCTYPE> pointing to a DTD, then a document loader created by this step will not attempt to load this DTD. The document loader will behave as if the <!DOCTYPE> was absent.
No parameters.
Save step
Saves input XHTML document to disk. The result of the this step is the save file.
Parameters (for clarity, the “save.” parameter name prefix is omitted here):
Name | Value | Description |
encoding | A valid character encoding (e.g. UTF-8, Windows-1252). Default: “UTF-8”. | Specifies the character encoding of the save file. |
indent | A boolean: true (same as: yes | on | 1) | false (same as: no | off | 0). Default: false. | Specifies whether the save file should be indented. Note: Do not specify indent=”true” in production. The XML indentation created this way being very simple, this may add whitespace inside elements where space characters are significant. |
out-file | A file path. No default (required). | Specifies the path of the save file. A relative file path is relative to the current working directory. |
Split step
Splits input XHTML document, whether styled or semantic, into several pages and saves these pages to disk.
This step also generates a frameset and a table of contents used as the left frame of the frameset. While an obsolete HTML feature, a frameset makes it easy browsing the generated pages. Moreover the table of contents used as the left frame is a convenient way to programmatically list all the generated pages.
The result of the this step is the file containing the frameset.
For clarity, the “split.” parameter name prefix is omitted here.
However when you’ll pass any of the following parameters to w2x, please do not forget this prefix. Example: -p split.split-before-level 8.
Parameters:
Name | Value | Description |
allow-lonely-heading | A boolean: true (same as: yes | on | 1) | false (same as: no | off | 0). Default: false. | If specified as true, allow a page to contain just a heading and nothing else. |
indent | A boolean: true (same as: yes | on | 1) | false (same as: no | off | 0). Default: false. | Specifies whether the save files should be indented. Note: Do not specify indent=”true” in production. The XML indentation created this way being very simple, this may add whitespace inside elements where space characters are significant. |
out-file | A file path. No default (required). | Specifies the path of the file containing the frameset. A relative file path is relative to the current working directory. This step always generates several files, all in the same directory as file out-file. This output directory is created on the fly if needed too. However, the output directory, if it already exists, is not automatically made empty. The file specified by out-file contains the frameset. Let’s suppose out-file is temp\foo.html. The table of contents of the frameset, its left frame, is created in temp\foo-TOC.html. Unless parameter use-id-as-filename has been specified as true, the styled HTML pages are created in temp\foo-0.html, temp\foo-1.html, temp\foo-2.html, …, temp\foo-N.html. |
split-before-level | Outline level between 0 (e.g. style “Heading 1”) and 8 (e.g. style “Heading 9”). Default: 0 (split at “Heading 1”). | In order to generate multi-page styled HTML, that is, frameset, Web Help, EPUB, we need to automatically split the input XHTML document into pages. A new page is created each time a paragraph having an outline level less than or equal to specified split-before-level parameter is found in the source. An outline level is an integer between 0 (e.g. style “Heading 1”) and 8 (e.g. style “Heading 9”). The default value of parameter split-before-level is 0, which means: for each “Heading 1”, create a new page starting with this “Heading 1”. See also Important tip. |
use-id-as-filename | A boolean: true (same as: yes | on | 1) | false (same as: no | off | 0). Default: false. | By default, the save files of the generated pages have the same basename as out-file, except that a number is appended to this basename. Example: out-file is temp\foo.html; the save files of the generated pages are thus: temp\foo-0.html, temp\foo-1.html, temp\foo-2.html, …, temp\foo-N.html. In a MS-Word document, a heading is often given a bookmark. The Convert step translates this bookmark to an ID. When use-id-as-filename is specified as true, the save file of a page is given a basename corresponding to the ID of the heading used to start this page. When this heading ID is missing, the Split step fallbacks to the default behavior. |
Transform step
Transforms input XML document or file using an XSLT 1.0 stylesheet. The result of the this step is the save file containing the transformed document.
Unlike the load step, if the input XML file starts with a <!DOCTYPE> pointing to a DTD, then the document loader created by a Transform step will silently skip this DTD.
For clarity, the “transform.” or “transform2.” parameter name prefix is omitted here.
However when you’ll pass any of the following parameters to w2x, please do not forget this prefix. Example: -p transform.cals-tables yes.
Parameters:
Name | Value | Description |
xslt-url-or-file | An absolute URL or the path of an existing file. No default (required). | Specifies which XSLT 1.0 stylesheet should be used to transform the input XML document. A relative file path is relative to the current working directory. |
out-file | A file path. No default (required). | Specifies the path of the save file. A relative file path is relative to the current working directory. |
Any other parameter is passed to the XSLT stylesheet as an XSLT stylesheet parameter. Which XSLT stylesheet parameters are supported depend on the XSLT stylesheet being used.
Table 4 Parameters of w2x:xslt/docbook.xslt, docbook5.xslt, which are used to convert input XHTML document to DocBook v4 or v5
Name | Value | Description |
docbook-version | DocBook version (“4.5”, “5.0”, “5.1” or “5.2”). Default: “4.5” for docbook.xslt, “5.0” for docbook5.xslt. | Specifies the version of DocBook. This number is used to specify which <!DOCTYPE> to add to the generate file or, in the case of DocBook 5, the value of the version attribute of the root element of the generated file. Please remember that versions of DocBook older than “4.3” do not support HTML tables. (HTML tables, not CALS tables, are generated by default. See below.) |
cals-tables | “yes” | “no”. Default: “no”. | If “yes”, generate CALS tables. If “no”, generate HTML tables. Note that cals-table=”yes” requires specifying Convert step parameter set-column-number=”yes”. |
hierarchy-name | “book” | “article” | “part” | “chapter” | “appendix” | “section” | “book-sect1” | “article-sect1” | “part-sect1” | “chapter-sect1” | “appendix-sect1” | “sect1” | “sect2” | “sect3” | “sect4” | “sect5” . Default: “book”. | Specifies the root element name and type of sections of the DocBook document to be generated. |
media-alt | “yes” | “no”. Default: “no”. | If “yes”, convert the alt attribute of XHTML element img to DocBook alt element. If “no”, ignore the alt attribute of XHTML element img. |
pre-element-name | An element local name. Default: “literallayout”. | Specifies to which DocBook element, an HTML pre element is to be converted. |
Table 5 Parameters of w2x:xslt/assembly.xslt, which are used to convert input DocBook V5.1 book to a DocBook V5.1 assembly
Name | Value | Description |
add-index | “yes” | “no”. Default: “yes”. | Ignored if the input book document does not contain any index term. If “yes”, add an index module at the end of the assembly. If “no”, do not add an index module at the end of the assembly. |
output-path | An absolute or relative “file:” URI. No default (required). | Specifies the URI of the directory which is to contain all generated files. A relative URI is relative to the current working directory. |
section-depth | “1”, “2”, “3”, “4”, “5”, “6”, “7”, “8”, “9”. Default: “1”. | Specifies the module structure of the assembly (always acting as a book) to be generated. Example 1: an assembly generated using section-depth=”1” only contains chapter modules. Example 2: an assembly generated using section-depth=”2” contains chapter modules, themselves possibly containing section modules. Example 3: an assembly generated using section-depth=”3” contains chapter modules, themselves possibly containing section modules, themselves possibly containing section modules (acting as subsections). |
topic-path | An absolute or relative “file:” URI. No default: generate topic files in output-path. | Specifies the URI of the subdirectory directory which is to contain all generated DocBook V5.1 topic files. A relative URI is relative to output-path. |
Table 6 Parameters of w2x:xslt/topic.xslt, which is used to convert input XHTML document to a DITA topic
Name | Value | Description |
root-topic-id | An XML ID. Default: automatically generated ID. | Specifies the ID of the root topic. |
single-topic | “yes” | “no”. Default: “no”. | If “yes”, convert input <div class=”role-sectionN”> to (non-nested) DITA section elements. If “no”, convert input <div class=”role-sectionN”> to nested topics. |
topic-type | “topic” |“concept” | “generalTask” | “task” (same as: “strictTask” ) | “reference”. Default: “topic”. | Specifies the type of topics to be created by the XSLT stylesheet. |
pre-element-name | An element local name. Default: “pre”. | Specifies to which DITA element, an HTML pre element is to be converted. |
shortdesc-class-name | A class name. Default: “”. Examples: p-Shortdesc, p-Abstract. | Specifies the class name of the XHTML <p> which acts as a short description of the section. When this parameter is not specified (or is specified as the empty string which is its default value), the following style mapping, created by the w2x-app wizard: -p edit.blocks.convert¬ "p-Shortdesc p class='p-Shortdesc'" ... <xsl:template match="h:p[@class='p-Shortdesc']"> <shortdesc> <xsl:call-template name="processCommonAttributes"/> <xsl:apply-templates/> </shortdesc> </xsl:template> causes DITA <shortdesc> elements to generated inside topic bodies, which is invalid. After specifying -p transform.shortdesc-class-name¬ p-Shortdesc this issue is fixed and DITA <shortdesc> elements are generated before topic bodies. |
Table 7 Parameters of w2x:xslt/xhtml_strict.xslt, xhtml_loose.xslt, xhtml1_1.xslt, xhtml5.xslt, which are used to convert input XHTML 1.0 Transitional document to XHTML having a different version
Name | Value | Description |
add-xml-lang | “yes” | “no”. Default: “yes” for xhtml_strict, xhtml_loose, xhtml1_1; “no” for xhtml5. | If “yes”, add an xml:lang attribute to all XHTML elements having a lang attribute. |
discard-index-terms | “yes” | “no”. Default: “yes”. | If “yes”, discard <span class=”role-index-term”> elements. If “no”, keep <span class=”role-index-term”> elements. |
footnote-number-format | A valid XSLT number format (value of attribute format of element xsl:number). Default: “[1]”. | When parameter number-footnotes is “yes”, specifies the format of the numeric label used for footnotes and footnote callouts. |
generate-xref-text | “yes” | “no”. Default: “yes”. | If “yes”, add hyperlink text to a elements which are cross-references. If “no”, keep empty a elements which are cross-references. |
number-footnotes | “yes” | “no”. Default: “yes”. | If “yes”, add a numeric label to footnotes and footnote callouts. If “no”, do not add a numeric label to footnotes and footnote callouts. |
style-with-class | “yes” | “no”. Default: “no”. | If “yes”, add a class attribute to some elements to allow using a CSS stylesheet to style them. For example: convert <center> to <div class=”center”>. If “no”, add a direct style to some elements to style them. For example: convert <center> to <div style=”text-align:center;”>. |
Table 8 Parameters of w2x:xslt/map.xslt, bookmap.xslt, which are used to convert input DITA topic file to a map or bookmap
Name | Value | Description |
add-index | “yes” | “no”. Default: “yes”. | bookmap.xslt only. Ignored if the input topic document does not contain any index term. If “yes”, add an indexlist element to the back matter of the bookmap . If “no”, do not add an indexlist element to the back matter of the bookmap. |
add-toc | “yes” | “no”. Default: “yes”. | bookmap.xslt only. If “yes”, add a toc element to the front matter of the bookmap. If “no”, do not add a toc element to the front matter of the bookmap. |
output-path | An absolute or relative “file:” URI. No default (required). | Specifies the URI of the directory which is to contain all generated files. A relative URI is relative to the current working directory. |
section-depth | “1”, “2”, “3”, “4”, “5”, “6”, “7”, “8”, “9”. Default: “1”. | Specifies the topicref structure of the DITA map to be generated. Example 1: a bookmap generated using section-depth=”1” only contains chapter topicrefs. Example 2: a bookmap generated using section-depth=”2” contains chapter topicrefs, themselves possibly containing plain topicrefs (acting as sections). Example 3: a bookmap generated using section-depth=”3” contains chapter topicrefs, themselves possibly containing plain topicrefs (acting as sections), themselves possibly containing other plain topicrefs (acting as subsections). |
topic-path | An absolute or relative “file:” URI. No default: generate topic files in output-path. | Specifies the URI of the subdirectory directory which is to contain all generated topic files. A relative URI is relative to output-path. |
topic-type | “topic” | “concept” | “generalTask” | “task” (same as: “strictTask” ) | “reference”. No default. See description. | Specifies the type of topics to be created by the topic.xslt XSLT stylesheet. See above. This parameter is used to make a difference between a strict task and a general task. In all other cases, this parameter may be omitted. |
Web Help step
Splits input XHTML document, whether styled or semantic, into several pages and compiles these pages into a Web Help. The Web Help compiler used to do this is free, open source, XMLmind Web Help Compiler.
This step always generates UTF-8 encoded, “.html” files, no matter the parameters specifying other values.
Same parameters as the Split step, plus the following Web Help specific parameters (for clarity, the “webhelp.” parameter name prefix is omitted here):
Name | Value | Description |
add-index | “yes” | “no”. Default: “yes”. | If “yes”, automatically create an index.html file, if an index.html file does not already exist. |
omit-toc-root | “yes” | “no” Default: “no”. | By default, the TOC generated for a Web Help document has a single “root”. This single root always points to the page containing the title, subtitle, author, etc, of the document. Setting this parameter to “yes” prevents the generated TOC from having such single root. |
wh-* (wh-local-jquery, wh-layout, wh-collapse-toc, etc) | String. No default. | All parameters starting with “wh-“ are passed as is to XMLmind Web Help Compiler. Example: -p webhelp.wh-collapse-toc yes. These parameters are all documented in XMLmind Web Help Compiler, Parameters. |
Embedding w2x in a Java™ application
Embedding w2x in a Java™ application is as simple as:
Create an instance of class Processor.
Configure it by passing an array of option strings identical to those of the w2x command line utility to method Processor.configure or (low-level) by directly adding conversion steps and parameters to Processor.stepList and Processor.parameterMap.
Invoke the configured processor to convert specified input file to specified output file. This is done invoking high-level method Processor.process or low-level method Processor.executeSteps.
About thread-safety
An instance of Processor cannot be shared by different threads.
It’s strongly recommend not to reuse an instance of Processor. That is, please create one instance of Processor per conversion.
The reference manual (generated using javadoc) of the Java API of w2x is found in XMLmind Word To XML Java™ API.
High-level example w2x_install_dir/doc/manual/embed/Embed1.java:
Processor processor = new Processor();
int l = processor.configure(args);
File inFile = null;
File outFile = null;
if (l+2 == args.length) {
inFile = new File(args[l]);
outFile = new File(args[l+1]);
} else {
System.exit(1);
}
processor.process(inFile, outFile, /*progress monitor*/ null);
Compile Embed1.java by executing “ant”10 in w2x_install_dir/doc/manual/embed/.
Run “ant tembed1” in w2x_install_dir/doc/manual/embed/. This creates w2x_install_dir/doc/manual/embed/tembed1.dita.
Lower-level example w2x_install_dir/doc/manual/embed/Embed2.java:
Processor processor = new Processor();
ConvertStep convertStep = new ConvertStep("convert");
processor.stepList.add(convertStep);
EditStep editStep = new EditStep("edit");
processor.stepList.add(editStep);
processor.parameterMap.put("edit.xed-url-or-file",
"w2x:xed/main-styled.xed");
SaveStep saveStep = new SaveStep("save");
processor.stepList.add(saveStep);
processor.parameterMap.put("save.indent", "yes");
processor.process(inFile, outFile, /*progress monitor*/ null);
Compile Embed2.java by executing “ant” in w2x_install_dir/doc/manual/embed/.
Run “ant tembed2” in w2x_install_dir/doc/manual/embed/. This creates w2x_install_dir/doc/manual/embed/tembed2.xhtml.
Extension points
Custom conversion step
The stock conversion steps are: com.xmlmind.w2x.processor.ConvertStep, DeleteFilesStep, EditStep, LoadStep, SaveStep, TransformStep.
A custom conversion step may be implemented by deriving abstract class com.xmlmind.w2x.processor.ProcessStep. Such task poses no technical problems whatsoever. Suffice for that to implement a single method: ProcessStep.process.
See reference of class com.xmlmind.w2x.processor.ProcessStep.
Custom image converters
Image converters are used to convert images having a format not supported by Web browsers (TIFF, WMF, EMF, etc) to a format supported by Web browsers (SVG, PNG, JPEG).
Image converters are specified by interface com.xmlmind.w2x.docx.image.ImageConverterFactory. XMLmind Word To XML ships with 4 classes implementing this interface:
com.xmlmind.w2x.docx.image.ImageConverterFactoryImpl
Image converter factory used to convert TIFF images to PNG or JPEG.
com.xmlmind.w2x_ext.wmf_converter.WMFConverterFactory
Image converter factory used to convert WMF/EMF graphics to SVG.
WMFConverterFactory has one parameter called maxsize. Its value is an integer expressed in bytes. The default value of parameter maxsize is 4194304.
For some WMF/EMF input files, WMFConverterFactory may generate very large or incorrect SVG output files. This generally depends on the software which was used to create these WMF/EMF files. Parameter maxsize 4194304 limits the size of the SVG files WMFConverterFactory can create to 4194304 bytes.
See below how to simply and quickly get rid of WMFConverterFactory in order to force the use of “more stable” EMF2PNG on Windows.
com.xmlmind.w2x_ext.emf2png.EMF2PNG
This image converter factory is available only on Windows. It leverages Windows own GDI+ to convert EMF (in fact, Windows metafiles of any kind, including WMF) to PNG.
Note that, unlike above WMFConverterFactory which converts WMF/EMF (Windows vector graphics formats) to SVG (standard vector graphics format), EMF2PNG converts a vector graphics format to a raster image format. However, having EMF2PNG is useful because it’s quick and reliable and on Windows, it will be automatically used as a fallback when WMFConverterFactory fails to convert an WMF/EMF file to SVG.
EMF2PNG has one parameter called resolution. Its value is a real number expressed in Dot Per Inch (DPI). The default value of parameter resolution is -300.
The resolution parameter specifies the resolution of the output PNG file. 0 means: same resolution as the one found input EMF/WMF file; a positive number means: use this value to override the resolution found in the input EMF/WMF file; a negative number means: use specified absolute value but only if this absolute value is greater than the resolution found in the input EMF/WMF file.
com.xmlmind.w2x.docx.image.ExternalImageConverter
This image converter factory executes an external program to perform the conversion. See 9.1.2.1 below.
If you want w2x to support more image formats, you’ll have to create your own ImageConverterFactory and register it with w2x using method ImageConverterFactories.register.
About thread-safety
A single instance of a class implementing ImageConverterFactory is used by all instances of com.xmlmind.w2x.processor.Processor. This implies that an implementation of ImageConverterFactory must be thread-safe.
See reference of package com.xmlmind.w2x.docx.image.
Specifying an external image converter
Examples of W2X_IMAGE_CONVERSIONS specifications (see 9.1.2.2 below):
Convert EMF/WMF to SVG using OpenOffice/LibreOffice:
.emf.svg.wmf.svg soffice --headless --convert-to svg -–outdir %~po %i
Or equivalently using unoconv:
.emf.svg.wmf.svg unoconv -f svg -o %o %i
Convert EMF to SVG using Inkscape:
.emf.svg inkscape -l -o %o %i
The command executed by an external image converter may contain the following variables:
Variable | Definition |
%I | Absolute path of the input image file. |
%O | Absolute path of the output image file. |
%i | Same as %I but quoted, that is, equivalent to “%I”. |
%o | Same as %O but quoted, that is, equivalent to “%O”. |
%S | File separator: “\” on Windows, “/” on Mac/Linux. |
The following modifiers may be applied to the %I, %O, %i, %o variables:
Modifier | Definition |
~p | Absolute path of the parent directory of the file. For example, if %I is “C:\temp\doc_files\logo.wmf”, then %~pI is “C:\temp\doc_files”. |
~n | Basename of the file. For example, if %I is “C:\temp\doc_files\logo.wmf”, then %~nI is “logo.wmf”. |
~r | Basename of the file without any extension. For example, if %I is “C:\temp\doc_files\logo.wmf”, then %~rI is “logo”. |
~e | Extension of the file. For example, if %I is “C:\temp\doc_files\logo.wmf”, then %~eI is “wmf”. |
Also note that “%%” may be used to escape character “%”. More generally, just like in an URL, an %HH UTF-8 sequence may be used to escape any character. Example: “%3B” is “;” (semi colon), “%C3%A9” is “é” (“e” with acute accent).
Controlling how image files found in the input DOCX file are converted to standard formats
Conversion of images found in the DOCX file (TIFF, WMF, EMF, etc) to standard formats (SVG, PNG, JPEG) may be controlled using environment variable (or Java™ property) W2X_IMAGE_CONVERSIONS.
The default value of this variable is (all specifications on a single line):
.emf.svg.wmf.svg¬
java:com.xmlmind.w2x_ext.wmf_converter.WMFConverterFactory maxsize 4194304;
.tiff.png java:com.xmlmind.w2x.docx.image.ImageConverterFactoryImpl
On Windows, the default value of W2X_IMAGE_CONVERSIONS is (all specifications on a single line):
.emf.svg.wmf.svg¬
java:com.xmlmind.w2x_ext.wmf_converter.WMFConverterFactory maxsize 4194304;
.emf.png.wmf.png java:com.xmlmind.w2x_ext.emf2png.EMF2PNG resolution -300;
.tiff.png java:com.xmlmind.w2x.docx.image.ImageConverterFactoryImpl
The syntax of W2X_IMAGE_CONVERSIONS is:
specifications -> “-” | specification_list
specification_list -> specification [ “;” specification ]+
specification -> “+” | image_conversion
image_conversion -> extensions S ( java_image_conversion | external_image_conversion )
extensions -> [ “.” input_file_extension “.” output_file_extension ]+
java_image_conversion -> “java:” fully_qualified_java_class_name parameters
parameters -> [ S parameter_name S possibly_quoted_parameter_value ]*
external_image_conversion -> command_line
About this syntax:
“-” means: no specifications; hence no image conversions at all.
“+” means: insert default value of W2X_IMAGE_CONVERSIONS at this point. Example:
set W2X_IMAGE_CONVERSIONS=.emf.svg inkscape -l -o %o %i;+
where default value of W2X_IMAGE_CONVERSIONS is (on Windows):
.emf.svg.wmf.svg¬
java:com.xmlmind.w2x_ext.wmf_converter.WMFConverterFactory maxsize 4194304;
.emf.png.wmf.png java:com.xmlmind.w2x_ext.emf2png.EMF2PNG resolution -300;
.tiff.png java:com.xmlmind.w2x.docx.image.ImageConverterFactoryImpl
Note that the image conversion specifications are considered in the order of their declarations in variable W2X_IMAGE_CONVERSIONS. In the case of the above example, it’s custom “inkscape -l -o %o %i” which is used to convert EMF to SVG and not the following converter in the list which is “java:com.xmlmind.w2x_ext.wmf_converter.WMFConverterFactory maxsize 4194304”.
However if an image converter fails (e.g. if inkscape fails) then the following converters (e.g. WMFConverterFactory and then EMF2PNG) found in the W2X_IMAGE_CONVERSIONS list will be automatically considered.
A simple way to change the default value of W2X_IMAGE_CONVERSIONS is to delete or rename the .jar file of an image converter. For example, if you delete or rename W2X_INSTALL_DIR\lib\wmf_converter.jar (which contains WMFConverterFactory) on Windows in order to force the use of “more stable” EMF2PNG, the default value of W2X_IMAGE_CONVERSIONS becomes automatically:
.emf.png.wmf.png java:com.xmlmind.w2x_ext.emf2png.EMF2PNG resolution -300;
.tiff.png java:com.xmlmind.w2x.docx.image.ImageConverterFactoryImpl
Limitations and implementation specificities
The Convert step does not support the following MS-Word features.
By “does not support”, we mean that w2x will not generate something useful corresponding to such features. We don’t mean that using such features in a DOCX file would cause w2x to fail or to generate invalid XML documents.
Right to left scripts.
Enclose characters.
Asian layout.
Cover Page. Blank Page.
Text wrapping of tables and pictures other than the simplest one.
Picture formats other than GIF, PNG, JPEG, BMP, TIFF, WMF and EMF are not supported.
Clip Art. Shapes. SmartArt. Chart.
Header. Footer. Page Number.
Japanese Greetings. Text Box. WordArt. Drop Cap.
Object.
All features related to Page Layout except (to a minimal extent) page and column breaks and end of sections.
All features related to Mailings.
All features related to Spelling & Grammar, except of course the various languages used in the document (i.e. lang attribute).
Comments.
All features related to Change Tracking.
When a DOCX file contains revision info (i.e. "Track Changes"), w2x implements its own, automatic, very crude, interpretation of "Accept All Changes". That's why, a warning is issued informing the user that she/he would better use MS-Word to manually accept or reject the tracked changes before submitting the DOCX file to w2x.
All features related to (document) Compare, (document) Protect.
Macros.
Controls.
The Convert step generates XHTML+CSS documents having the following specificities:
Tab stops are converted to <span class="role-tab"> </span>. See About tab stops.
MS-Word document properties having no standard meta equivalent are given names starting with “ms-”. Example:
<meta content="Hussein Shafie" name="ms-cp-lastModifiedBy" />
MS-Word “styles” having no CSS equivalent are a given a “-ms-” prefix. Example:
.p-Heading3 {
-ms-outlineLvl: 2;
color: #4F81BD;
font-family: Cambria;
...
Page breaks are translated to <?break-page?>. Column breaks are translated to <?break-column?>. End of sections are signaled by <?end-of-section?>.
WMF/EMF pictures are converted to SVG.
OpenXML math, for example , is converted to MathML.
Conversion from OpenXML math to MathML is implemented by an XSLT 1.0 stylesheet called omml2mml.xsl coming from open source project XSL stylesheets for TEI XML. If you think you have access to a better XSLT stylesheet than open source omml2mml.xsl, then you may use it by specifying environment variable (or Java™ system property) W2X_MATH_CONVERTER_XSLT. Example:
set W2X_MATH_CONVERTER_XSLT=C:\Users\john\My better omml2mml.xsl
All simple and most complex fields are converted to a <?field code?> having a <span class="role-field"> parent. Example:
<span class="role-field">
<?field DATE \@ "MMMM d, yyyy" \* MERGEFORMAT ?>
August 27, 2014
</span>
Smart tags are enclosed between <?begin-smartTag tag?> and <?end-smartTag tag?>. Example:
<?begin-smartTag {urn:schemas-microsoft-com:office:smarttags}PersonName#0?>
<?begin-smartTag {urn:schemas:contacts}GivenName#1?>
Bill
<?end-smartTag {urn:schemas:contacts}GivenName#1?>
<?begin-smartTag {urn:schemas:contacts}Sn#2?>
Gates
<?end-smartTag {urn:schemas:contacts}Sn#2?>
<?end-smartTag {urn:schemas-microsoft-com:office:smarttags}PersonName#0?>
Controls are enclosed between <?begin-sdt control_id?> and <?end-sdt control_id?>. Example:
<?begin-sdt comboBox#6?>
<td class="tc-TableGrid--bb tc-TableGrid"
style="padding-bottom: 7.2pt; padding-left: 7.2pt;
padding-right: 7.2pt; padding-top: 7.2pt;">
<p class="tp-TableGrid p-Normal" lang="fr-FR">
<span class="c-PlaceholderText">Choose an item.</span>
</p>
</td>
<?end-sdt comboBox#6?>
The language of DOCX files written in an East Asian language is not correctly detected.
Unfortunately, this will always be the case because w2x never examines the characters actually contained in a text span having <w:lang w:eastAsia="ja-JP" w:val="en-US"/> to determine whether this text span is written in ja-JP or is written in en-US or is written is a mix of both languages.
However, a partial workaround for this limitation is to specify for example –p convert.set-lang ja-JP or –p convert.default-lang ja-JP. When parameter convert.set-lang or parameter convert.default-lang is set to a language code starting with ja, zh or ko, then it is attribute w:lang/@w:eastAsia which is used to determine the language of a text span and not attribute w:lang/@w:val.
Note that –p convert.default-lang ja-JP is just used as a hint to favor attribute w:lang/@w:eastAsia over attribute wlang/@w:val. Given the way MS-Word sets these two attributes, using parameter –p convert.default-lang ja-JP will not cause a vastly incorrect detection of the language when converting a German DOCX file for example.
w2x can generate DITA indexterm elements having index-sort-as children and DocBook indexterm/primary, secondary, tertiary elements having sortas attributes. For this to happen, the input DOCX file must contain XE (index entry) fields having \y "yomi" (first phonetic character for sorting indexes) field arguments.
Unlike MS-Word which considers \y "yomi" only for East Asian languages, w2x uses this XE field argument to sort the index entries whatever the language of the document. English examples: {XE "<span>" \y "span"}, {XE "Operation:+" \y ":Addition"}.
About tab stops
Tab stops are converted to <span class="role-tab"> </span>. These span elements are processed as follows:
When generating styled HTML (that is, XHTML+CSS), some JavaScript™ code (w2x_install_dir/xed/expand-tabs.js) is added to the output file. This code computes and gives a width to all <span class=”role-tab> </span>. This allows to decently emulate tab stops in any modern Web browser.
If you don't want this code to be added to the output file, pass option -p edit.do.expand-tabs "" to w2x.
When generating semantic XHTML and all the other semantic XML formats (DocBook, DITA, etc), it's possible to convert consecutive paragraphs containing text runs aligned on tab stops to a borderless table.
However because, in the general case, it's not possible to emulate tab stops using tables, this XED script is disabled by default. If you really want to emulate tab stops using tables, pass option -p edit.convert-tabs.to-table yes to w2x.
Index
A
About East Asian languages 43, 45
add-index, parameter 61, 63
add-toc, parameter 64
add-xml-lang, parameter 63
allow-lonely-heading, parameter 58
automatic-ids, parameter 42
B
-batch, option 37
before-save.allow-flow, parameter 49
biblio.style-names, parameter 50
blocks.convert, parameter 50
blocks.convert-to-pre, parameter 50
C
-c, option 19, 33, 39, 41
cals-tables, parameter 60
captions.style-names, parameter 51
charset, parameter 41, 42
CJK See About East Asian languages
Convert, step 42
converted-image-extensions, parameter 42
convert-tabs.to-table, parameter 51
convert-tabs.unwrap-paragraphs, parameter 51
cover-image-url-or-file, parameter 56
create-mathml-object, parameter 43
D
default-lang, parameter 43, 56, 73
Delete files, step 46
discard-index-terms, parameter 63
DITA bookmap, output format 17
DITA map, output format 17
DITA topic, output format 17
DocBook 4, output format 16
DocBook 5, output format 16
DocBook V5.1 assembly, output format 16, 61
docbook-version, parameter 60
E
-e, option 20, 33, 39, 41
-e2, option 39
Edit, step 46
encoding, parameter 57
EPUB, output format 16, 17, 44, 56, 59
F
-f, option 40
files, parameter 46
finish-styles.css-uri, parameter 47
finish-styles.mathjax, parameter 47
finish-styles.mathjax-url, parameter 48
footnote-number-format, parameter 63
frameset, output format 17, 58, 59
frameset, output format 16
G
generate-xref-text, parameter 63
H
headings.convert, parameter 51
hierarchy-name, parameter 60
I
identifier, parameter 56
ids.generate-section-ids, parameter 51
ids.section-id-max-length, parameter 52
indent, parameter 57, 58
index.index-term-separator, parameter 52
inlines.b-element, parameter 52
inlines.big-element, parameter 52
inlines.convert, parameter 53
inlines.generate-big-small, parameter 53
inlines.i-element, parameter 52
inlines.s-element, parameter 52
inlines.small-element, parameter 52
inlines.sub-element, parameter 52
inlines.sup-element, parameter 52
inlines.tt-element, parameter 52
inlines.u-element, parameter 52
L
-l, option 39
lists.alternate-ordered-list-grouping, parameter 53
-liststeps, option 20, 38
Load, step 57
lower-case-resource-names, parameter 44
M
MathML 43, 47, 72
MathJax 47, 48
media-alt, parameter 61
metas.keep, parameter 53
N
number-footnotes, parameter 63
O
-o, option 16, 17, 38
omit-toc-root, parameter 65
omit-toc-root, parameter 56
out-file, parameter 41, 57, 58, 60
Outline level 17, 18, 59
output-path, parameter 61, 64
P
-p, option 38, 41
-p, parameter 19, 20
plugin 8, 34, 38
format 34
registry 35
pre-element-name, parameter 61, 62
-printenv, option 37
prune.preserve, parameter 54
-pu, option 39
-pu, parameter 20
R
remove-pis.except, parameter 49
remove-styles.preserved-classes, parameter 54
resource-directory, parameter 44
resource-prefix, parameter 44
root-topic-id, parameter 62
S
-s, option 39, 41
Save, step 57
section-depth, parameter 61, 64
sections.max-level, parameter 54
servlet 10
curl 13
multipart/form-data 13
POST 13
set-column-number, parameter 45
set-lang, parameter 45, 73
shortdesc-class-name, parameter 62
single-topic, parameter 62
split-before-level, parameter 17, 59
-step, option 20, 39
style-with-class, parameter 63
T
-t, option 20, 33, 39
-t2, option 39
tab stops 51, 72, 74
title.keep-title, parameter 48
title.subtitle-container, parameter 49
title.subtitle-style-names, parameter 49
title.title-container, parameter 48
title.title-style-names, parameter 49
topic-path, parameter 61, 64
topic-type, parameter 62, 64
Transform, step 60
U
us-id-as-filename, parameter 59
V
-v, option 37
-version, option 37
version, parameter 45
-vv, option 19, 37
-vvv, option 37
W
w2x_plugin, file extension See plugin
W2X_PLUGIN_PATH, environment variable 36
w2x-app 7, 9
Web Help, output format 16, 17, 59, 64
webhelp.add-index, parameter 65
webhelp.wh-*, parameters 65
X
xed-url-or-file, parameter 46
XHTML 1.0 Strict, output format 17
XHTML 1.0 Transitional, output format 17
XHTML 1.1, output format 17
XHTML 5.0, output format 17
XHTML, output format 15, 17
xhtml-file, parameter 45
XMLmind Web Help Compiler 64, 65
XMLmind XML Editor add-on 9
xslt-url-or-file, parameter 60
1 However, “jar xvf converted.zip” works fine. jar is a command-line utility which comes with all Java Development Kits (JDK).
2 curl is an open source command line tool and library for transferring data with URL syntax.
3 This option is “-p convert.charset UTF-8”. See charset parameter.
4 But not automatically made empty if the output directory already exists.
5 A custom conversion step derives from abstract class com.xmlmind.w2x.processor.ProcessStep.
6 It’s a paragraph style because the CSS style name has a “p-“ prefix.
7 Any value would do (e.g. g:id=”foo” would have worked as well). Suffice for consecutive elements to be grouped to all have the same g:id attribute.
8 Unless you specify:
-p edit.prune.preserve "p-ProgramListing"
script w2x_install_dir/xed/prune.xed will cause open lines to be stripped from the generated pre element.
9 Because only XHTML 5 documents may embed MathML. With any other version of XHTML, this would cause the document to become invalid.
10 Apache Ant is a command-line utility for automating software build processes. By default, ant uses an XML file, called build.xml to describe the build process and its dependencies. In the case of the two above code samples, this file is w2x_install_dir/doc/manual/embed/build.xml.