Chapter 2. Deploying the WebApp on your existing Servlet Container Previous topic Parent topic Child topic Next topic

By following the procedure below step by step, a member of your IT staff (not an end-user) should be able to easily deploy the XMLmind XSL Server WebApp on a Servlet Container.

Before you begin

Required software:
  • Java™ runtime 1.8+ . Both Oracle Java Opens in new window and OpenJDK Opens in new window are officially supported.
  • A Servlet Container compatible with the Servlet 2.3+ standard.

Procedure

  1. Stop the Servlet Container.
  2. Copy install_dir/xslsrv.war, the .war file containing the XMLmind XSL Server WebApp, to the WebApp deployment directory of your Servlet Container.
    Important
    Important
    About Apache Tomcat version 10 and above
    Beware that there is a major breaking change between latest versions of Apache Tomcat Opens in new window (>= 10) and older versions (<= 9). This is documented in this migration article Opens in new window.
    To make a long story short, if you need to deploy the “Word To XML” servlet on Tomcat version 10+ Opens in new window, then you first must create a webapps-javaee/ folder next to TOMCAT_INSTALL_DIR/webapps/ then copy xslsrv.war to this TOMCAT_INSTALL_DIR/webapps-javaee/.
    Tomcat example, assuming that Tomcat has been installed in /opt/tomcat/:
    /# cp /opt/xslsrv/xslsrv.war /opt/tomcat/webapps
  3. Restart the Servlet Container.
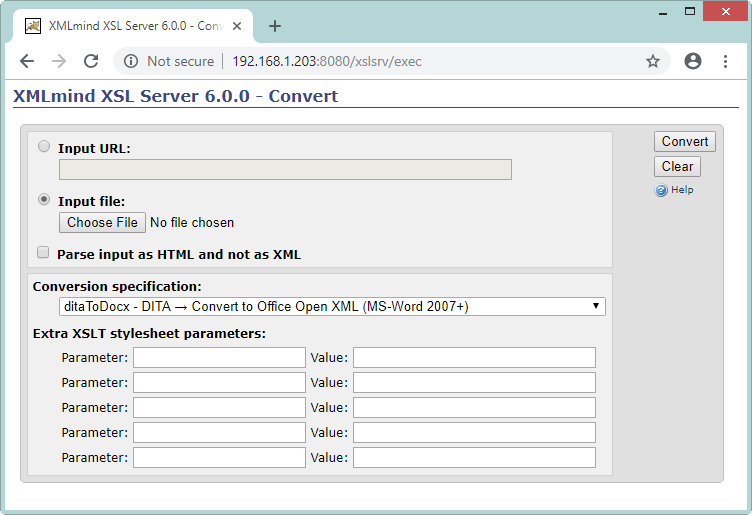
  4. Test that XMLmind XSL Server is up and running by pointing your Web browser to the xslsrv/exec URL.
    For example, let's suppose that the URL of the Servlet Container is http://localhost:8080/. Type http://localhost:8080/xslsrv/exec in the address bar of your Web browser.
    You should be able to see the following interactive Convert form.
    empty_convert_form.png

What to do next

After deploying XMLmind XSL Server as explained above and testing that it works fine, you may want to: