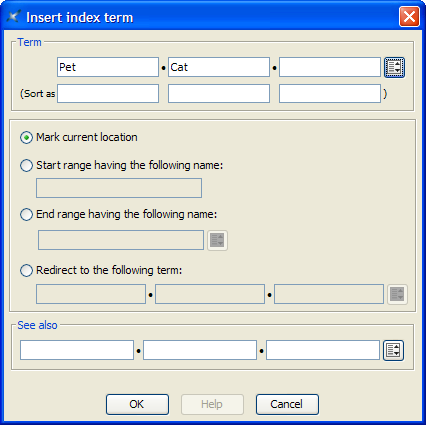
This dialog box, displayed by menu item , allows to insert or edit an
<indexterm> element.
We'll explain with examples how to use the
<indexterm> editor.
-
If you want to get this kind of entry in your back of the book
index:
P
Pet 12
specify Term=Pet.
-
Back of the book index:
P
Pet
    Cat 26
specify Term=Pet,
Term #2=Cat.
-
Back of the book index:
P
"+" 54
specify Term="+",
Sort as=plus. Without this
Sort as specification, the index entry
corresponding to "+" would have been found in the
Symbols category:
Symbols
"*" 53, 78
"+" 54
"-" 55, 91-95
...
-
Back of the book index:
D
Domesticated animals 34 See also Pet
specify
Term=Domesticated animals,
See also=Pet.
Note that the
content of the See also field must refer to an
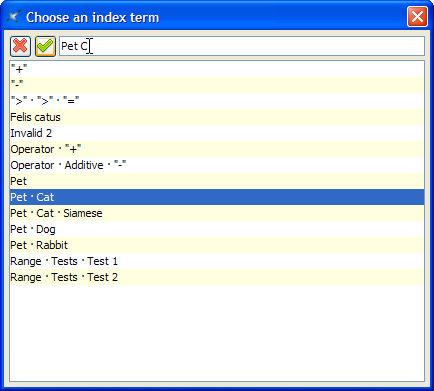
existing index entry. That's why instead of typing "Pet", you
can select this index entry by using the dialog box displayed by the
Pick from list button found at the right of the
See also row.
The above dialog box supports autocompletion. Note that if, for
example, you want specify compound term
"Pet Cat Siamese", you must type a space character
between each simple term.
-
Back of the book index:
F
Felis catus See Pet, Cat
specify
Term=Felis catus, select
"Redirect to the following term" then specify
Redirect=Pet,
Redirect #2=Cat. (In the above
example, notice that Felis catus has no associated page
number.)
Like See Also, the content of
the Redirect field must refer to an existing
index entry. Unlike See Also, a
Redirect entry is merely a redirection to an
actual index entry.
-
Back of the book index:
O
Operation
    Additive
        "+" 87-90
-
Insert a first <indexterm> element
at the beginning the range (this will give us page number
87).
In order to do that, use and specify
Term=Operation,
Term #2=Additive,
Term #3="+", Sort
as #3=plus.
Then check
"Start range having the following name" and
give your range an identifier by specifying
"plus_reference" in the Start
range field.
-
Insert another <indexterm> element
at the end the range (this will give us page number 90).
In
order to do that, use , check "End range having the following
name" and specify the same identifier,
"plus_reference", in the End range
field. All the other fields must be left blank.
Note that
instead of typing "plus_reference" in the End
range field, you can select this identifier by using
the dialog box displayed by the Pick from
list button found at the right of the End
range field.